Friendly · Bo7 · engine v5.3
· Thu, Aug 6 2026 · 01:59 server time
Games
4 · · ▶ replay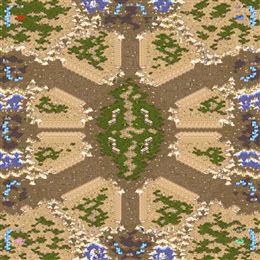
■ Lacustrine
■ Rubbish
army value
■ Lacustrine
■ Rubbish
economy
Play-by-play (7 lines)
0:19 The game starts with Blue Lacustrine spawning at s1 and White Paranoid spawning at s3.Lacustrine in Blue at s1. Paranoid in White at s3. The map is set.
2:18 Paranoid gets 12 Hatch against Lacustrine's Proxy Rax.The builds are down: Proxy Rax from Lacustrine, 12 Hatch from Paranoid.
4:45 Lacustrine opens with a cheesy build.Lacustrine isn't playing fair today — the cheese is on.
🎙 Rubbish is hanging on by a thread against Lacustrine's army.
6:53 Taking the advantage of an aggressive build, Lacustrine attacks Paranoid.Lacustrine commits to the cheese — it's at Paranoid's door already.
9:02 Paranoid GGs after being cheesed by Lacustrine.The cheese lands — Paranoid GGs, and Lacustrine steals the game.
Rubbish taps out. Lacustrine's early game was simply better.
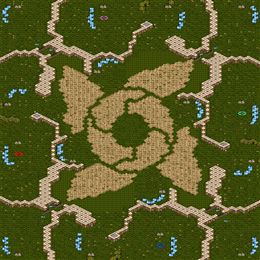
■ Watchfully
■ Piz - Neverland
army value
■ Watchfully
■ Piz - Neverland
economy
Play-by-play (119 lines)
0:07 The game starts with Green Watchfully spawning at s4 and Blue Ronda spawning at s1.Watchfully in Green at s4. Ronda in Blue at s1. The map is set.
0:35 Watchfully gets Forge Fast Expand against Ronda's Overpool.Watchfully commits to Forge Fast Expand; Ronda answers with Overpool.
— The early game —
1:05 Watchfully warps in a nexus.Watchfully plants a new base and dares his opponent to punish it.
1:19 Ronda places down a hatchery.Ronda takes another base — the economy widens.
1:38 Watchfully is putting some early pressure on with his dragoons.No patience from Watchfully: the first units are already marching.
🎙 The armies trade evenly; this one is still anyone's game.
2:16 Ronda decides to move out with his armies.Ronda has seen enough — the army moves out.
2:31 Both armies meet at the center of the map and start attacking.Contact in the middle of the map. Everything is committed.
2:54 Ronda kills off Watchfully's armies and continues pushing!Ronda wins the fight convincingly and keeps rolling forward.
3:31 After that battle, Watchfully still has most of his army with him.A cheap fight for Ronda — the losses are light.
3:49 With excellent skills and micro, Ronda managed to fend off Watchfully while losing less than half of his army.A cheap fight for Watchfully — the losses are light.
4:18 Watchfully is pushing out with his zealots.Watchfully tests the door early. Is anyone home?
4:32 Ronda is bringing his speedlings out for a walk and maybe decide to kill enemy units on the way.Ronda goes early — pressure before either side is ready.
5:03 Currently, neither Watchfully nor Ronda appears to be leading in economy.Base for base, they're level — Watchfully and Ronda match each other.
5:24 Watchfully warps in a nexus.Quietly, Watchfully adds a base. These are the moves that decide long games.
🎙 The armies trade evenly; this one is still anyone's game.
5:55 Ronda places down a hatchery.Ronda takes another base — the economy widens.
6:22 As both armies meet, they soon start exchanging fires!Here it comes: two full armies, one engagement.
6:41 Ronda with his speedlings successfully defend against Watchfully's early zealot pressure.Watchfully's early gamble buys nothing — Ronda's defense was already in place.
7:06 With excellent skills and micro, Ronda managed to fend off Watchfully while losing less than half of his army.A cheap fight for Watchfully — the losses are light.
7:30 After that battle, Watchfully still has most of his army with him.Ronda keeps most of his army intact through the exchange.
7:45 Watchfully is putting some early pressure on with his dragoons.Watchfully goes early — pressure before either side is ready.
8:20 Ronda decides to start pushing across the map.Ronda tightens the formation and starts the long walk.
8:51 The two armies clash and a large battle starts to happen!Neither side backs off — the battle is joined.
9:17 Watchfully lost some of his dragoons to Ronda's speedlings!The early pressure works — Ronda breaks Watchfully's front door.
🎙 Dead even — neither player has found the edge yet.
9:28 Losing only less than half of his army, Watchfully seems to be fine.A cheap fight for Ronda — the losses are light.
10:06 Losing only less than half of his army, Ronda seems to be fine.Watchfully keeps most of his army intact through the exchange.
10:29 Ronda's forces appear to be larger compared to Watchfully's!Ronda's army is visibly the bigger one — Watchfully should not take this fight.
10:36 Watchfully warps in a nexus.Quietly, Watchfully adds a base. These are the moves that decide long games.
11:20 Ronda places down a hatchery.More workers, more money: Ronda expands.
11:39 Ronda is bringing his speedlings out for a walk and maybe decide to kill enemy units on the way.No patience from Ronda: the first units are already marching.
11:55 As both armies meet, they soon start exchanging fires!Here it comes: two full armies, one engagement.
12:18 Ronda kills off Watchfully's armies and continues pushing!Ronda wins the fight convincingly and keeps rolling forward.
12:50 It seems that Ronda only managed to destroy less than half of Watchfully's army.Ronda clips Watchfully's army — real damage, but Watchfully fights on.
🎙 Piz - Neverland edges ahead on army strength.
13:11 With excellent skills and micro, Ronda managed to fend off Watchfully while losing less than half of his army.Watchfully keeps most of his army intact through the exchange.
— The mid game —
13:29 Ronda now has enough hydralisk to take the game! ... Or so he thinks.Ronda's hydra wave rolls out — this is the timing Zerg lives for.
14:10 Watchfully warps in a nexus.Watchfully plants a new base and dares his opponent to punish it.
14:31 Ronda places down a hatchery.Ronda takes another base — the economy widens.
14:44 The two armies meet and a large battle starts to engage!Here it comes: two full armies, one engagement.
15:11 Ronda micros his hydralisks nicely to avoid Watchfully's storms, and seems to have won the battle!The mid-game push crashes through — Ronda breaks Watchfully's position.
15:31 About half of Watchfully's army has been decimated in that battle.Half of Ronda's force stays on that battlefield.
16:08 Losing only less than half of his army, Ronda seems to be fine.Watchfully keeps most of his army intact through the exchange.
16:30 Ronda has a large number of hydralisk and is starting to push out!Ronda's hydra wave rolls out — this is the timing Zerg lives for.
🎙 Watchfully is a step behind and knows it.
16:43 Watchfully must macro up quickly or Ronda will just roll him over!Watchfully is badly outgunned — Ronda's force is a size larger.
17:10 As both armies meet, they soon start exchanging fires!The armies collide — this is the fight both of them wanted.
17:45 Ronda micros his hydralisks nicely to avoid Watchfully's storms, and seems to have won the battle!The mid-game push crashes through — Ronda breaks Watchfully's position.
18:16 That attack didn't seem to do much damage, Ronda destroyed only less than half of Watchfully's army.Ronda clips Watchfully's army — real damage, but Watchfully fights on.
18:23 After that battle, Ronda still has most of his army with him.Watchfully keeps most of his army intact through the exchange.
19:01 Watchfully desperate in getting his economy pumped up, expands to another location.More workers, more money: Watchfully expands.
19:23 Ronda brings his lurker-lings to pressure his opponent.Ronda's hydra wave rolls out — this is the timing Zerg lives for.
19:49 The battle to decide the game begins!The armies collide — this is the fight both of them wanted.
20:16 Ronda's scourge sniped a few of Watchfully's observers! Watchfully can't deal with the lurkers and lost the battle!The mid-game push crashes through — Ronda breaks Watchfully's position.
🎙 Piz - Neverland edges ahead on army strength.
20:32 Watchfully has lost about half of his army in that battle.Half of Ronda's force stays on that battlefield.
20:51 After that battle, Ronda still has most of his army with him.Watchfully keeps most of his army intact through the exchange.
21:27 Watchfully tried to sneak in a dark templar but it was killed off before it can deal any damage to Ronda's economy.Watchfully goes for the raid — Ronda is ready, and nothing comes of it.
21:41 Attempting to end the game, Ronda moves out with his armies.No more waiting. Ronda pushes.
22:11 The two armies meet and a large battle starts to engage!The armies collide — this is the fight both of them wanted.
22:43 Watchfully's speedlots dealt with Ronda's speedlings, while archons dealt with mutalisks. Watchfully successfully fended against Ronda's push!Watchfully absorbs the mid-game push — Ronda gained nothing for the cost.
23:03 That attack didn't seem to do much damage, Ronda destroyed only less than half of Watchfully's army.Ronda takes a bite out of Watchfully's force and backs off.
23:23 With excellent skills and micro, Ronda managed to fend off Watchfully while losing less than half of his army.A cheap fight for Watchfully — the losses are light.
23:46 Ronda now has enough hydralisk to take the game! ... Or so he thinks.Ronda's hydra wave rolls out — this is the timing Zerg lives for.
🎙 The armies trade evenly; this one is still anyone's game.
24:23 Watchfully's forces appear to be larger compared to Ronda's!Watchfully's army is visibly the bigger one — Ronda should not take this fight.
24:41 The battle to decide the game begins!Neither side backs off — the battle is joined.
25:00 Ronda's zerglings surround Watchfully's archons while Ronda's lurkers deal with the rest. The outcome seems to favor Ronda!The mid-game push crashes through — Ronda breaks Watchfully's position.
25:21 With excellent skills and micro, Watchfully managed to fend off Ronda while losing less than half of his army.A cheap fight for Ronda — the losses are light.
25:46 Losing only less than half of his army, Ronda seems to be fine.A cheap fight for Watchfully — the losses are light.
26:20 Watchfully tried to sneak in a dark templar but it was killed off before it can deal any damage to Ronda's economy.Watchfully knocks, Ronda answers. No damage done.
26:43 Ronda brings his lurker-lings to pressure his opponent.Ronda's hydra wave rolls out — this is the timing Zerg lives for.
27:09 The two armies clash and a large battle starts to happen!The dance is over. They fight.
27:34 Ronda's combination of lurkers and hydralisks totally decimated Watchfully's army.Watchfully's defense bends, then snaps. Ronda takes the middle of the game.
🎙 Even footing again — the tension builds.
27:54 It seems that Ronda only managed to destroy less than half of Watchfully's army.Ronda takes a bite out of Watchfully's force and backs off.
28:14 Losing only less than half of his army, Ronda seems to be fine.A cheap fight for Watchfully — the losses are light.
28:44 Watchfully is sniping overlords with his corsairs, and oh! His archons and speedlots are out of base as well!Watchfully's mid-game army is assembled — and it's moving.
29:03 Ronda brings his lurker-lings to pressure his opponent.Ronda's hydra wave rolls out — this is the timing Zerg lives for.
29:33 The battle to decide the game begins!The dance is over. They fight.
30:04 Watchfully's massive number of speedlots slice through Ronda's zerglings and hydralisks.Ronda's defense bends, then snaps. Watchfully takes the middle of the game.
30:16 Losing only less than half of his army, Ronda seems to be fine.A cheap fight for Watchfully — the losses are light.
30:35 Losing only less than half of his army, Watchfully seems to be fine.A cheap fight for Ronda — the losses are light.
31:06 Reaver! Reaver! Watchfully's reaver is killing off most of Ronda's workers!Watchfully gets into Ronda's mineral line — workers are dying.
🎙 Dead even — neither player has found the edge yet.
31:33 Ronda successfully blocked Watchfully from harassing his economy.Good instincts from Ronda; the harassment dies at the doorstep.
31:59 Ronda decides to start pushing across the map.Here it comes: Ronda crosses the map with everything.
32:17 The two armies meet and a large battle starts to engage!Both players push to the middle of the map, and a large fight breaks out.
32:47 All of a sudden, Watchfully has no armies left while Ronda is continuing to push across the map!A clean, brutal win for Ronda. The push continues.
33:05 That attack didn't seem to do much damage, Ronda destroyed only less than half of Watchfully's army.Ronda takes a bite out of Watchfully's force and backs off.
33:35 After that battle, Ronda still has most of his army with him.A cheap fight for Watchfully — the losses are light.
34:02 Ronda's forces appear to be larger compared to Watchfully's!Count the units: Ronda has the edge over Watchfully right now.
34:25 Where is Ronda's detector? Watchfully sends dark templars to harass Ronda's mineral line!The raid lands — Watchfully chips away at Ronda's foundation.
34:40 Ronda moves out with his armies.No more waiting. Ronda pushes.
🎙 The armies trade evenly; this one is still anyone's game.
35:24 As both armies meet, they soon start exchanging fires!The dance is over. They fight.
35:39 With archons and speedlots and high templars, Ronda didn't even have a chance against Watchfully.The timing was right but the fight was wrong: Watchfully holds Ronda.
36:04 With excellent skills and micro, Watchfully managed to fend off Ronda while losing less than half of his army.A cheap fight for Ronda — the losses are light.
36:22 After that battle, Ronda still has most of his army with him.A cheap fight for Watchfully — the losses are light.
36:53 Reaver! Reaver! Watchfully's reaver is killing off most of Ronda's workers!The raid lands — Watchfully chips away at Ronda's foundation.
37:20 Watchfully harasses Ronda's economy and gets ahead of the game.Beautiful harassment from Watchfully. Ronda's economy takes a real hit.
37:40 Looks like Watchfully is going to push out with his archons and speedlots!Watchfully hits the timing — this push arrives exactly when it hurts.
38:10 The two armies clash and a large battle starts to happen!Contact in the middle of the map. Everything is committed.
— The late game —
38:25 Ronda ran dry of larva at exactly the wrong moment. Watchfully is inside the third.The final army does its work — Watchfully breaks Ronda late.
🎙 The scales tip toward Watchfully — a lead, but not a safe one.
38:44 Ronda has lost about half of his army in that battle.Watchfully pays for that trade with about half his army.
39:15 Losing only less than half of his army, Watchfully seems to be fine.A cheap fight for Ronda — the losses are light.
39:49 Corsairs sweeping ahead, the ground army behind — Watchfully moves on the hatcheries.This is the big one — Watchfully commits the late-game army.
40:00 Both armies meet at the center of the map and start attacking.Contact in the middle of the map. Everything is committed.
40:28 The battle outcome favors Watchfully as Ronda's armies melt into Watchfully's armies' weapon fire!Ronda's army evaporates. Watchfully doesn't even slow down.
40:46 Ronda has lost about half of his army in that battle.Watchfully pays for that trade with about half his army.
41:14 With excellent skills and micro, Watchfully managed to fend off Ronda while losing less than half of his army.Ronda keeps most of his army intact through the exchange.
41:42 Watchfully rolls out with archons and speedlots, templar trailing on full energy.This is the big one — Watchfully commits the late-game army.
42:08 Looking at the opponent's overwhelming forces, Ronda GGs!Ronda GGs. A hard-fought game comes to its end.
That's the game: Watchfully defeats Piz - Neverland, settled in the late game.
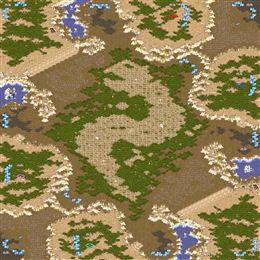
■ Plasticize
■ Tonttu
army value
■ Plasticize
■ Tonttu
economy
Play-by-play (148 lines)
0:16 The Blue Plasticize spawns at s1 while Orange Welder spawns at s3.Plasticize takes s1 in Blue; Welder settles in at s3 in Orange.
0:41 Welder opens 14 CC against Plasticize's 12 Hatch.Plasticize commits to 12 Hatch; Welder answers with 14 CC.
— The early game —
0:57 Plasticize places down a hatchery.Plasticize plants a new base and dares his opponent to punish it.
1:23 Welder places down a command center.Welder takes another base — the economy widens.
1:54 Plasticize with a large number of zerglings starts pushing out.No patience from Plasticize: the first units are already marching.
🎙 Nothing between them. One engagement could decide it.
2:10 Welder feels confident with his marines and decides to push out.Welder tests the door early. Is anyone home?
2:24 The two armies clash and a large battle starts to happen!Both players push to the middle of the map, and a large fight breaks out.
3:02 Plasticize was out-microed by Welder and loses all his attacking forces.The attack shatters on Welder's line. Great positioning.
3:10 With excellent skills and micro, Welder managed to fend off Plasticize while losing less than half of his army.A cheap fight for Plasticize — the losses are light.
3:50 Losing only less than half of his army, Plasticize seems to be fine.A cheap fight for Welder — the losses are light.
4:09 Plasticize places down a hatchery.Plasticize plants a new base and dares his opponent to punish it.
4:39 Welder places down a command center.Welder takes another base — the economy widens.
4:46 Plasticize's zerglings are pushing out!Plasticize tests the door early. Is anyone home?
5:28 Welder moves out with his armies.Here it comes: Welder crosses the map with everything.
🎙 Dead even — neither player has found the edge yet.
5:49 Both armies meet at the center of the map and start attacking.Neither side backs off — the battle is joined.
5:56 Welder kills off Plasticize's zerglings with his marines!Plasticize wasn't ready. Welder's early aggression takes the lead.
6:27 That attack didn't seem to do much damage, Welder destroyed only less than half of Plasticize's army.Welder clips Plasticize's army — real damage, but Plasticize fights on.
6:50 After that battle, Welder still has most of his army with him.A cheap fight for Plasticize — the losses are light.
7:15 Plasticize is putting early pressure with his zerglings.Plasticize goes early — pressure before either side is ready.
7:48 Welder decides to put on early pressure with his marines.No patience from Welder: the first units are already marching.
8:11 In terms of army size, Plasticize is behind Welder!Plasticize is badly outgunned — Welder's force is a size larger.
8:20 Plasticize places down a hatchery.Quietly, Plasticize adds a base. These are the moves that decide long games.
8:43 Welder places down a command center.More workers, more money: Welder expands.
🎙 The armies trade evenly; this one is still anyone's game.
9:15 As both armies meet, they soon start exchanging fires!The armies collide — this is the fight both of them wanted.
9:47 Nice control from Plasticize! He killed Welder's marines and continues pressuring!The early pressure works — Plasticize breaks Welder's front door.
10:05 Welder lost about half of his army in that battle.Plasticize pays for that trade with about half his army.
10:33 Losing only less than half of his army, Plasticize seems to be fine.Welder keeps most of his army intact through the exchange.
11:00 Plasticize's zerglings are pushing out!Plasticize goes early — pressure before either side is ready.
11:07 Welder feels confident with his marines and decides to push out.No patience from Welder: the first units are already marching.
11:42 The two armies meet and a large battle starts to engage!Neither side backs off — the battle is joined.
11:59 Mismicro from Welder gave opportunity to Plasticize! Plasticize is still pushing and putting pressure with his zerglings!The early pressure works — Plasticize breaks Welder's front door.
12:17 With excellent skills and micro, Welder managed to fend off Plasticize while losing less than half of his army.Plasticize keeps most of his army intact through the exchange.
🎙 Nothing between them. One engagement could decide it.
12:59 With excellent skills and micro, Plasticize managed to fend off Welder while losing less than half of his army.Welder keeps most of his army intact through the exchange.
13:08 Welder places down a command center.Welder plants a new base and dares his opponent to punish it.
— The mid game —
13:32 Plasticize is flying his mutalisks towards his opponent.Plasticize's mid-game army is assembled — and it's moving.
13:56 Plasticize places down a hatchery.Quietly, Plasticize adds a base. These are the moves that decide long games.
14:16 The battle to decide the game begins!Neither side backs off — the battle is joined.
14:39 Welder seems to have run out of scans! Plasticize's lurkers cleans up the remaining army!The mid-game push crashes through — Plasticize breaks Welder's position.
15:02 With excellent skills and micro, Welder managed to fend off Plasticize while losing less than half of his army.Plasticize keeps most of his army intact through the exchange.
15:25 With excellent skills and micro, Plasticize managed to fend off Welder while losing less than half of his army.Welder keeps most of his army intact through the exchange.
15:54 Zerglings ran past Welder's defense line and start harassing the mineral line! What a nice run-by by Plasticize!The raid lands — Plasticize chips away at Welder's foundation.
🎙 The scales tip toward Plasticize — a lead, but not a safe one.
16:30 Plasticize brings his speedlings and lurkers out of his base!The composition is ready; Plasticize starts the push.
16:47 Both Plasticize and Welder appears to have equal expansions now.Base for base, they're level — Plasticize and Welder match each other.
17:19 As both armies meet, they soon start exchanging fires!Neither side backs off — the battle is joined.
17:39 Plasticize is attacking with lurker-lings and mutalisks! Welder's armies melt in the attack.Welder's defense bends, then snaps. Plasticize takes the middle of the game.
18:06 After that battle, Welder still has most of his army with him.Plasticize keeps most of his army intact through the exchange.
18:20 Losing only less than half of his army, Plasticize seems to be fine.Welder keeps most of his army intact through the exchange.
18:43 Plasticize brings his speedlings and lurkers out of his base!Plasticize's mid-game army is assembled — and it's moving.
19:14 Plasticize places down a hatchery.More workers, more money: Plasticize expands.
19:23 Welder places down a command center.Quietly, Welder adds a base. These are the moves that decide long games.
🎙 Tonttu is a step behind and knows it.
20:03 As both armies meet, they soon start exchanging fires!Contact in the middle of the map. Everything is committed.
20:15 Plasticize's well-placed lurkers caught Welder's tanks and medics off-guard! Welder's army is completely melting!Welder's defense bends, then snaps. Plasticize takes the middle of the game.
20:38 Losing only less than half of his army, Welder seems to be fine.Plasticize keeps most of his army intact through the exchange.
20:57 After that battle, Plasticize still has most of his army with him.Welder keeps most of his army intact through the exchange.
21:36 Plasticize shot down Welder's command center.No reinforcements in time: Welder watches Plasticize level the expansion.
21:58 Welder places down a command center.More workers, more money: Welder expands.
22:08 Plasticize decides to put some pressure on his opponent.Plasticize tightens the formation and starts the long walk.
22:37 The battle to decide the game begins!Here it comes: two full armies, one engagement.
23:03 Welder seems to have run out of scans! Plasticize's lurkers cleans up the remaining army!Welder's defense bends, then snaps. Plasticize takes the middle of the game.
🎙 The scales tip toward Plasticize — a lead, but not a safe one.
23:34 After that battle, Welder still has most of his army with him.Plasticize keeps most of his army intact through the exchange.
23:57 Losing only less than half of his army, Plasticize seems to be fine.A cheap fight for Welder — the losses are light.
24:06 Plasticize places down a hatchery.Quietly, Plasticize adds a base. These are the moves that decide long games.
24:34 Welder places down a command center.More workers, more money: Welder expands.
25:05 Plasticize decides to start pushing across the map.Plasticize tightens the formation and starts the long walk.
25:36 The two armies meet and a large battle starts to engage!Contact in the middle of the map. Everything is committed.
25:53 Plasticize is attacking with both mutalisks and zerglings! Watch Welder's marines melt in this attack!Welder's defense bends, then snaps. Plasticize takes the middle of the game.
26:23 About half of Welder's army has been decimated in that battle.Plasticize pays for that trade with about half his army.
26:30 With excellent skills and micro, Plasticize managed to fend off Welder while losing less than half of his army.Welder keeps most of his army intact through the exchange.
🎙 The scales tip toward Plasticize — a lead, but not a safe one.
26:55 Plasticize brings his speedlings and lurkers out of his base!Plasticize's mid-game army is assembled — and it's moving.
27:26 Both armies meet at the center of the map and start attacking.Neither side backs off — the battle is joined.
27:41 Plasticize lost all of his mutalisks by suiciding into Welder's M&M group! His remaining speedlings weren't able to do much damage either.The timing was right but the fight was wrong: Welder holds Plasticize.
28:21 That attack didn't seem to do much damage, Plasticize destroyed only less than half of Welder's army.Plasticize takes a bite out of Welder's force and backs off.
28:32 After that battle, Plasticize still has most of his army with him.Welder keeps most of his army intact through the exchange.
29:02 Plasticize places down a hatchery.Plasticize plants a new base and dares his opponent to punish it.
29:30 Plasticize starts pushing across the map.Plasticize has seen enough — the army moves out.
29:54 Both armies meet at the center of the map and start attacking.Neither side backs off — the battle is joined.
30:18 Plasticize's well-placed lurkers caught Welder's tanks and medics off-guard! Welder's army is completely melting!The mid-game push crashes through — Plasticize breaks Welder's position.
🎙 The armies trade evenly; this one is still anyone's game.
30:41 With excellent skills and micro, Welder managed to fend off Plasticize while losing less than half of his army.A cheap fight for Plasticize — the losses are light.
30:59 That attack didn't seem to do much damage, Welder destroyed only less than half of Plasticize's army.Welder takes a bite out of Plasticize's force and backs off.
31:17 Dropship! Dropship! Welder drops some vultures into Plasticize's mineral line!Welder gets into Plasticize's mineral line — workers are dying.
31:54 It seems like Plasticize has more units than Welder!Count the units: Plasticize has the edge over Welder right now.
32:18 Plasticize has been very lucky to scout the incoming harassment by Welder.No surprises today — Plasticize's harassment is scouted early.
32:45 Welder is still going ahead with his harassment!Plans change: Welder's raiders are needed on defense.
33:06 Welder tried to sneak a drop but it was discovered by Plasticize.Good instincts from Plasticize; the harassment dies at the doorstep.
33:31 Plasticize is flying his mutalisks towards his opponent.Plasticize's mid-game army is assembled — and it's moving.
33:56 The two armies clash and a large battle starts to happen!The dance is over. They fight.
🎙 Dead even — neither player has found the edge yet.
34:13 Plasticize is attacking with both mutalisks and zerglings! Watch Welder's marines melt in this attack!Welder's defense bends, then snaps. Plasticize takes the middle of the game.
34:39 That attack didn't seem to do much damage, Plasticize destroyed only less than half of Welder's army.Plasticize takes a bite out of Welder's force and backs off.
34:47 It seems that Welder only managed to destroy less than half of Plasticize's army.Welder clips Plasticize's army — real damage, but Plasticize fights on.
35:11 Welder dropped some marines into Plasticize's mineral line!The raid lands — Welder chips away at Plasticize's foundation.
35:35 Plasticize is flying his mutalisks towards his opponent.Plasticize's mid-game army is assembled — and it's moving.
35:58 Welder is pushing out with a large M&M ball!Welder's mid-game army is assembled — and it's moving.
36:25 The two armies clash and a large battle starts to happen!The dance is over. They fight.
36:56 Welder seemed like winning the battle but when Plasticize's mutalisks came into the scene, things changed, Plasticize won the battle!The timing was right but the fight was wrong: Plasticize holds Welder.
37:23 Losing only less than half of his army, Plasticize seems to be fine.A cheap fight for Welder — the losses are light.
🎙 Even footing again — the tension builds.
37:42 With excellent skills and micro, Welder managed to fend off Plasticize while losing less than half of his army.A cheap fight for Plasticize — the losses are light.
38:12 Plasticize appears to have more army than Welder!Count the units: Plasticize has the edge over Welder right now.
38:21 Plasticize is flying his mutalisks towards his opponent.Plasticize's mid-game army is assembled — and it's moving.
38:58 Eager to end the game, Welder moves out with his armies.Here it comes: Welder crosses the map with everything.
39:22 The two armies clash and a large battle starts to happen!Both players push to the middle of the map, and a large fight breaks out.
39:52 Plasticize kills off Welder's armies and continues pushing!Plasticize wins the fight convincingly and keeps rolling forward.
39:59 It seems that Plasticize only managed to destroy less than half of Welder's army.Plasticize clips Welder's army — real damage, but Welder fights on.
40:31 With excellent skills and micro, Plasticize managed to fend off Welder while losing less than half of his army.A cheap fight for Welder — the losses are light.
— The late game —
41:00 Hive tech and a full defiler pack — Plasticize is moving out!Everything Plasticize has built comes forward at once.
🎙 Nothing between them. One engagement could decide it.
41:19 The battle to decide the game begins!Neither side backs off — the battle is joined.
41:48 Ultralisks into the tank line under swarm — Plasticize destroys everything Welder had.The final army does its work — Plasticize breaks Welder late.
41:57 Plasticize destroyed less army than he should, only less than half of Welder's army has been decimated.Plasticize takes a bite out of Welder's force and backs off.
42:26 That attack didn't seem to do much damage, Welder destroyed only less than half of Plasticize's army.Welder takes a bite out of Plasticize's force and backs off.
42:44 Cloaked wraiths from Welder are harassing Plasticize!Plasticize looks away for one second and Welder makes him pay for it.
43:18 Hive tech and a full defiler pack — Plasticize is moving out!This is the big one — Plasticize commits the late-game army.
43:42 As both armies meet, they soon start exchanging fires!Here it comes: two full armies, one engagement.
44:08 Plasticize's defilers made that army unkillable and Welder's position is gone.The final army does its work — Plasticize breaks Welder late.
44:35 With excellent skills and micro, Welder managed to fend off Plasticize while losing less than half of his army.Plasticize keeps most of his army intact through the exchange.
🎙 The armies trade evenly; this one is still anyone's game.
44:50 Welder destroyed less army than he should, only less than half of Plasticize's army has been decimated.Welder takes a bite out of Plasticize's force and backs off.
45:07 Welder tried to drop some marines but they were cleared off by Plasticize.Welder knocks, Plasticize answers. No damage done.
45:33 Ultralisks in front, cracklings behind, defilers at the back: Plasticize commits everything.This is the big one — Plasticize commits the late-game army.
46:11 Welder creeps forward tank by tank, vessels overhead watching for lurkers.Everything Welder has built comes forward at once.
46:23 In terms of army size, Plasticize and Welder are around equal.The armies weigh the same — dead even on the field.
46:47 The two armies clash and a large battle starts to happen!Neither side backs off — the battle is joined.
47:20 Ultralisks into the tank line under swarm — Plasticize destroys everything Welder had.The final army does its work — Plasticize breaks Welder late.
47:40 With excellent skills and micro, Welder managed to fend off Plasticize while losing less than half of his army.A cheap fight for Plasticize — the losses are light.
48:06 After that battle, Plasticize still has most of his army with him.A cheap fight for Welder — the losses are light.
🎙 Dead even — neither player has found the edge yet.
48:17 Welder tried to sneak a drop but it was discovered by Plasticize.Welder goes for the raid — Plasticize is ready, and nothing comes of it.
48:46 Hive tech and a full defiler pack — Plasticize is moving out!Max supply, full upgrades: Plasticize moves out to end it.
49:05 The two armies clash and a large battle starts to happen!Neither side backs off — the battle is joined.
49:26 Plasticize's defilers made that army unkillable and Welder's position is gone.The final army does its work — Plasticize breaks Welder late.
49:57 Plasticize destroyed less army than he should, only less than half of Welder's army has been decimated.Plasticize takes a bite out of Welder's force and backs off.
50:14 After that battle, Plasticize still has most of his army with him.Welder keeps most of his army intact through the exchange.
50:47 Plague first, then the charge — Plasticize goes for the throat.Max supply, full upgrades: Plasticize moves out to end it.
51:20 After suffering a devastating loss in the battle, Welder GGs!Welder types it out: GG.
GG. Plasticize closes it out over Tonttu.
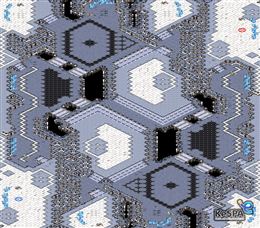
■ Sloven
■ Lorna
army value
■ Sloven
■ Lorna
economy
Play-by-play (239 lines)
0:13 Sloven spawns in Purple at s1 while Lorna spawns in White at s2.Cross positions or close ones, it starts here: Sloven at s1, Lorna at s2.
0:42 Sloven gets 2 Gate DT against Lorna's 1 Gate Cybernetics.The builds are down: 2 Gate DT from Sloven, 1 Gate Cybernetics from Lorna.
— The early game —
1:04 Sloven decides to move out with his armies.Sloven has seen enough — the army moves out.
🎙 Lorna is hanging on by a thread against Sloven's army.
1:18 Sloven opens with a cheesy build.Sloven Has cooked up something crazy, an early rush. They go all in!
1:40 Sloven with an aggressive opening starts to attack Lorna.All or nothing: Sloven's gamble arrives at Lorna's base.
1:56 Lorna warps in a nexus.Lorna takes another base — the economy widens.
2:25 As both armies meet, they soon start exchanging fires!The armies collide — this is the fight both of them wanted.
🎙 Nothing between them. One engagement could decide it.
2:36 The battle outcome favors Sloven as Lorna's armies melt into Sloven's armies' weapon fire!A clean, brutal win for Sloven. The push continues.
3:05 Losing only less than half of his army, Lorna seems to be fine.A cheap fight for Sloven — the losses are light.
3:22 That attack didn't seem to do much damage, Lorna destroyed only less than half of Sloven's army.Lorna takes a bite out of Sloven's force and backs off.
3:42 Sloven decides to push out with his dragoon.No patience from Sloven: the first units are already marching.
4:18 Sloven warps in a nexus.Sloven takes another base — the economy widens.
4:36 The battle to decide the game begins!The armies collide — this is the fight both of them wanted.
5:08 Sloven failed to kill off Lorna's defending dragoons.Sloven's early gamble buys nothing — Lorna's defense was already in place.
5:30 It seems that Sloven only managed to destroy less than half of Lorna's army.Sloven takes a bite out of Lorna's force and backs off.
5:49 Losing only less than half of his army, Sloven seems to be fine.A cheap fight for Lorna — the losses are light.
🎙 Even footing again — the tension builds.
6:02 Lorna is pushing out with his dragoons.No patience from Lorna: the first units are already marching.
6:25 The two armies meet and a large battle starts to engage!Both players push to the middle of the map, and a large fight breaks out.
6:59 Lorna kills off Sloven's dragoons with some nice micro!The early pressure works — Lorna breaks Sloven's front door.
7:19 With excellent skills and micro, Sloven managed to fend off Lorna while losing less than half of his army.Lorna keeps most of his army intact through the exchange.
7:44 With excellent skills and micro, Lorna managed to fend off Sloven while losing less than half of his army.A cheap fight for Sloven — the losses are light.
7:51 Sloven is putting on early pressure with his dragoon.Sloven tests the door early. Is anyone home?
8:27 The two armies meet and a large battle starts to engage!Contact in the middle of the map. Everything is committed.
8:43 Sloven failed to kill off Lorna's defending dragoons.Lorna holds the early rush without blinking.
9:03 Losing only less than half of his army, Lorna seems to be fine.Sloven keeps most of his army intact through the exchange.
🎙 Nothing between them. One engagement could decide it.
9:31 After that battle, Sloven still has most of his army with him.Lorna keeps most of his army intact through the exchange.
9:40 Lorna moves out with his armies.Lorna tightens the formation and starts the long walk.
10:01 Lorna warps in a nexus.Lorna plants a new base and dares his opponent to punish it.
10:33 As both armies meet, they soon start exchanging fires!The dance is over. They fight.
11:01 Lorna was out-microed by Sloven and loses all his attacking forces.Sloven holds! The push breaks against a perfect defense.
11:20 Lorna destroyed less army than he should, only less than half of Sloven's army has been decimated.Lorna clips Sloven's army — real damage, but Sloven fights on.
11:47 Losing only less than half of his army, Lorna seems to be fine.Sloven keeps most of his army intact through the exchange.
11:56 Sloven is putting on early pressure with his dragoon.Sloven tests the door early. Is anyone home?
12:19 Sloven warps in a nexus.Sloven plants a new base and dares his opponent to punish it.
🎙 Dead even — neither player has found the edge yet.
12:37 As both armies meet, they soon start exchanging fires!Contact in the middle of the map. Everything is committed.
13:01 Lorna lost all of his dragoons to Sloven!Lorna wasn't ready. Sloven's early aggression takes the lead.
13:41 With excellent skills and micro, Lorna managed to fend off Sloven while losing less than half of his army.A cheap fight for Sloven — the losses are light.
14:04 With excellent skills and micro, Sloven managed to fend off Lorna while losing less than half of his army.A cheap fight for Lorna — the losses are light.
14:21 Attempting to end the game, Lorna moves out with his armies.Lorna has seen enough — the army moves out.
14:48 Lorna's forces appear to be larger compared to Sloven's!Lorna's army is visibly the bigger one — Sloven should not take this fight.
15:11 Both armies meet at the center of the map and start attacking.Contact in the middle of the map. Everything is committed.
15:21 All of a sudden, Sloven has no armies left while Lorna is continuing to push across the map!Sloven's army evaporates. Lorna doesn't even slow down.
15:53 With excellent skills and micro, Sloven managed to fend off Lorna while losing less than half of his army.A cheap fight for Lorna — the losses are light.
🎙 The armies trade evenly; this one is still anyone's game.
16:00 After that battle, Lorna still has most of his army with him.A cheap fight for Sloven — the losses are light.
16:35 Sloven is pushing out with his dragoons.No patience from Sloven: the first units are already marching.
16:54 As both armies meet, they soon start exchanging fires!Neither side backs off — the battle is joined.
17:11 Sloven kills off Lorna's armies and continues pushing!The engagement breaks Lorna's way of life — Sloven marches on.
17:34 That attack didn't seem to do much damage, Sloven destroyed only less than half of Lorna's army.Sloven clips Lorna's army — real damage, but Lorna fights on.
17:51 After that battle, Sloven still has most of his army with him.A cheap fight for Lorna — the losses are light.
18:23 Lorna decides to push out with his dragoon.Lorna goes early — pressure before either side is ready.
18:37 Lorna warps in a nexus.Lorna plants a new base and dares his opponent to punish it.
19:16 As both armies meet, they soon start exchanging fires!The armies collide — this is the fight both of them wanted.
🎙 Nothing between them. One engagement could decide it.
19:35 Sloven lost all of his dragoons to Lorna!The early pressure works — Lorna breaks Sloven's front door.
19:43 It seems that Lorna only managed to destroy less than half of Sloven's army.Lorna clips Sloven's army — real damage, but Sloven fights on.
20:12 With excellent skills and micro, Lorna managed to fend off Sloven while losing less than half of his army.A cheap fight for Sloven — the losses are light.
20:34 Sloven is pushing out with his dragoons.No patience from Sloven: the first units are already marching.
20:52 Sloven desperate in getting his economy pumped up, expands to another location.Quietly, Sloven adds a base. These are the moves that decide long games.
21:12 Both armies meet at the center of the map and start attacking.Both players push to the middle of the map, and a large fight breaks out.
— The mid game —
21:36 Sloven with the better dragoon control won the battle!Lorna's defense bends, then snaps. Sloven takes the middle of the game.
21:55 With excellent skills and micro, Lorna managed to fend off Sloven while losing less than half of his army.Sloven keeps most of his army intact through the exchange.
22:21 Losing only less than half of his army, Sloven seems to be fine.A cheap fight for Lorna — the losses are light.
🎙 Even footing again — the tension builds.
22:57 It seems like Sloven has more units than Lorna!Count the units: Sloven has the edge over Lorna right now.
23:12 Unwilling to make the game too long, Sloven starts moving out.No more waiting. Sloven pushes.
23:40 The two armies meet and a large battle starts to engage!Both players push to the middle of the map, and a large fight breaks out.
23:47 Lorna without observers, is having quite a trouble dealing with Sloven's dark templars. It seems like Lorna lost all of his armies!Lorna's defense bends, then snaps. Sloven takes the middle of the game.
24:14 It seems that Sloven only managed to destroy less than half of Lorna's army.Sloven clips Lorna's army — real damage, but Lorna fights on.
24:40 Losing only less than half of his army, Sloven seems to be fine.Lorna keeps most of his army intact through the exchange.
25:01 Feeling content with the game, Sloven is starting to push out with his dragoons!Sloven hits the timing — this push arrives exactly when it hurts.
25:21 Lorna warps in a nexus.Quietly, Lorna adds a base. These are the moves that decide long games.
25:54 The two armies clash and a large battle starts to happen!The dance is over. They fight.
🎙 Even footing again — the tension builds.
26:09 Sloven kills off Lorna's armies and continues pushing!A clean, brutal win for Sloven. The push continues.
26:25 Sloven destroyed less army than he should, only less than half of Lorna's army has been decimated.Sloven clips Lorna's army — real damage, but Lorna fights on.
26:50 With excellent skills and micro, Sloven managed to fend off Lorna while losing less than half of his army.Lorna keeps most of his army intact through the exchange.
27:24 Sloven warps in a nexus.Sloven plants a new base and dares his opponent to punish it.
27:45 Sloven is pushing out with his dragoons!Sloven hits the timing — this push arrives exactly when it hurts.
28:09 Both armies meet at the center of the map and start attacking.Both players push to the middle of the map, and a large fight breaks out.
28:16 Sloven seems to have the more superior dragoon micro! Lorna's dragoons are melting away!The mid-game push crashes through — Sloven breaks Lorna's position.
28:38 After that battle, Lorna still has most of his army with him.A cheap fight for Sloven — the losses are light.
29:14 Losing only less than half of his army, Sloven seems to be fine.Lorna keeps most of his army intact through the exchange.
🎙 Dead even — neither player has found the edge yet.
29:24 Where is Sloven's detector? Lorna sends dark templars to harass Sloven's mineral line!Sloven looks away for one second and Lorna makes him pay for it.
29:46 Aaaaaa, Sloven's mineral line is stormed by Lorna's high templars!Beautiful harassment from Lorna. Sloven's economy takes a real hit.
30:06 Sloven warps in a nexus.More workers, more money: Sloven expands.
30:40 Lorna decides to expand.Quietly, Lorna adds a base. These are the moves that decide long games.
30:58 Lorna tried to sneak in a dark templar but it was killed off before it can deal any damage to Sloven's economy.Lorna knocks, Sloven answers. No damage done.
31:30 Sloven is pushing out with his dragoons!The composition is ready; Sloven starts the push.
31:37 Currently, neither Sloven nor Lorna appears to be leading in economy.The economies mirror one another. Nothing between Sloven and Lorna yet.
32:13 The two armies clash and a large battle starts to happen!Here it comes: two full armies, one engagement.
32:26 Sloven with a nice shuttle-reaver combo together with dragoon, decimates Lorna's army.Lorna's defense bends, then snaps. Sloven takes the middle of the game.
🎙 Nothing between them. One engagement could decide it.
32:59 After that battle, Lorna still has most of his army with him.A cheap fight for Sloven — the losses are light.
33:22 Losing only less than half of his army, Sloven seems to be fine.A cheap fight for Lorna — the losses are light.
33:29 Lorna tried to sneak in a dark templar but it was killed off before it can deal any damage to Sloven's economy.Good instincts from Sloven; the harassment dies at the doorstep.
33:55 Lorna tried to send in a shuttle but it was discovered by Sloven.The sneak attack is sniffed out — Sloven shuts the door on Lorna.
34:24 Feeling content with the game, Sloven is starting to push out with his dragoons!Sloven's mid-game army is assembled — and it's moving.
34:43 The two armies clash and a large battle starts to happen!Neither side backs off — the battle is joined.
35:00 Sloven with the better dragoon control won the battle!The mid-game push crashes through — Sloven breaks Lorna's position.
35:33 Losing only less than half of his army, Lorna seems to be fine.A cheap fight for Sloven — the losses are light.
35:54 Losing only less than half of his army, Sloven seems to be fine.A cheap fight for Lorna — the losses are light.
🎙 The armies trade evenly; this one is still anyone's game.
36:05 Lorna casts some storm! But Sloven lost no workers.Lorna knocks, Sloven answers. No damage done.
36:33 Sloven warps in a nexus.Sloven takes another base — the economy widens.
37:06 Lorna tried to sneak in a dark templar but it was killed off before it can deal any damage to Sloven's economy.Good instincts from Sloven; the harassment dies at the doorstep.
37:14 Sloven is bringing his dragoons, dark templars, observers and shuttle towards the center of the map!Sloven hits the timing — this push arrives exactly when it hurts.
37:46 Lorna is bringing his dragoons, dark templars, observers and shuttle towards the center of the map!Lorna's mid-game army is assembled — and it's moving.
37:57 The two armies meet and a large battle starts to engage!Both players push to the middle of the map, and a large fight breaks out.
38:16 Sloven kills off Lorna's armies and continues pushing!A clean, brutal win for Sloven. The push continues.
38:56 With excellent skills and micro, Lorna managed to fend off Sloven while losing less than half of his army.A cheap fight for Sloven — the losses are light.
39:20 Losing only less than half of his army, Sloven seems to be fine.A cheap fight for Lorna — the losses are light.
🎙 Nothing between them. One engagement could decide it.
39:34 Sloven is pushing out with his dragoons!Sloven hits the timing — this push arrives exactly when it hurts.
39:56 Lorna is bringing his dragoons, dark templars, observers and shuttle towards the center of the map!Lorna's mid-game army is assembled — and it's moving.
40:08 The two armies meet and a large battle starts to engage!Both players push to the middle of the map, and a large fight breaks out.
40:41 Nice shuttle-reaver micro by Lorna! That was the key of victory for this battle!The mid-game push crashes through — Lorna breaks Sloven's position.
40:52 Losing only less than half of his army, Sloven seems to be fine.A cheap fight for Lorna — the losses are light.
41:25 Losing only less than half of his army, Lorna seems to be fine.A cheap fight for Sloven — the losses are light.
41:36 Sloven is bringing his dragoons, dark templars, observers and shuttle towards the center of the map!Sloven's mid-game army is assembled — and it's moving.
42:07 Lorna is bringing his dragoons, dark templars, observers and shuttle towards the center of the map!Lorna's mid-game army is assembled — and it's moving.
42:27 The two armies meet and a large battle starts to engage!The dance is over. They fight.
🎙 The armies trade evenly; this one is still anyone's game.
42:56 Lorna's reavers proved significant advantage in this battle! Sloven has no choice but to back off!The timing was right but the fight was wrong: Lorna holds Sloven.
43:19 That attack didn't seem to do much damage, Sloven destroyed only less than half of Lorna's army.Sloven clips Lorna's army — real damage, but Lorna fights on.
43:37 It seems that Lorna only managed to destroy less than half of Sloven's army.Lorna clips Sloven's army — real damage, but Sloven fights on.
43:58 Lorna tried to send in a shuttle but it was discovered by Sloven.Good instincts from Sloven; the harassment dies at the doorstep.
44:30 Sloven is pushing out with his dragoons!Sloven's mid-game army is assembled — and it's moving.
44:41 Feeling content with the game, Lorna is starting to push out with his dragoons!The composition is ready; Lorna starts the push.
44:56 The two armies clash and a large battle starts to happen!Contact in the middle of the map. Everything is committed.
45:21 Lorna had some dark templars but under Sloven's observers, they're close to useless! Lorna had to back off!The timing was right but the fight was wrong: Sloven holds Lorna.
45:54 With excellent skills and micro, Sloven managed to fend off Lorna while losing less than half of his army.Lorna keeps most of his army intact through the exchange.
🎙 The armies trade evenly; this one is still anyone's game.
46:22 With excellent skills and micro, Lorna managed to fend off Sloven while losing less than half of his army.A cheap fight for Sloven — the losses are light.
— The late game —
46:45 Sloven pushes with reavers in the shuttles and templar behind the goon line.Everything Sloven has built comes forward at once.
46:52 Eager to end the game, Lorna moves out with his armies.Lorna has seen enough — the army moves out.
47:28 The battle to decide the game begins!The armies collide — this is the fight both of them wanted.
47:36 Sloven pushed into a full archon line and Lorna never gave a step.Sloven throws the endgame army in and Lorna simply refuses to lose.
47:54 After that battle, Lorna still has most of his army with him.Sloven keeps most of his army intact through the exchange.
48:27 With excellent skills and micro, Sloven managed to fend off Lorna while losing less than half of his army.A cheap fight for Lorna — the losses are light.
48:53 Lorna appears to have more army than Sloven!Count the units: Lorna has the edge over Sloven right now.
49:19 Attempting to end the game, Sloven moves out with his armies.Sloven has seen enough — the army moves out.
🎙 Nothing between them. One engagement could decide it.
49:31 Lorna pushes with reavers in the shuttles and templar behind the goon line.Everything Lorna has built comes forward at once.
50:01 The battle to decide the game begins!Both players push to the middle of the map, and a large fight breaks out.
50:19 Lorna had the observers out, and Sloven's dark templar did nothing at all.Sloven throws the endgame army in and Lorna simply refuses to lose.
50:31 Losing only less than half of his army, Lorna seems to be fine.Sloven keeps most of his army intact through the exchange.
50:55 Lorna destroyed less army than he should, only less than half of Sloven's army has been decimated.Lorna clips Sloven's army — real damage, but Sloven fights on.
51:27 Sloven pushes with reavers in the shuttles and templar behind the goon line.This is the big one — Sloven commits the late-game army.
51:38 Lorna moves out with his armies.Lorna has seen enough — the army moves out.
52:04 Both armies meet at the center of the map and start attacking.Both players push to the middle of the map, and a large fight breaks out.
52:35 Lorna pushed into a full archon line and Sloven never gave a step.Lorna throws the endgame army in and Sloven simply refuses to lose.
🎙 Even footing again — the tension builds.
52:49 After that battle, Sloven still has most of his army with him.Lorna keeps most of his army intact through the exchange.
53:09 With excellent skills and micro, Lorna managed to fend off Sloven while losing less than half of his army.Sloven keeps most of his army intact through the exchange.
53:33 Archons made, storms ready, upgrades done: Sloven moves out.Everything Sloven has built comes forward at once.
53:54 Lorna pushes with reavers in the shuttles and templar behind the goon line.Max supply, full upgrades: Lorna moves out to end it.
54:20 The battle to decide the game begins!Here it comes: two full armies, one engagement.
54:44 Sloven's carriers are untouchable now and Lorna concedes the map.The final army does its work — Sloven breaks Lorna late.
55:00 With excellent skills and micro, Lorna managed to fend off Sloven while losing less than half of his army.Sloven keeps most of his army intact through the exchange.
55:26 Losing only less than half of his army, Sloven seems to be fine.Lorna keeps most of his army intact through the exchange.
55:53 Lorna casts some storm! But Sloven lost no workers.The sneak attack is sniffed out — Sloven shuts the door on Lorna.
🎙 Dead even — neither player has found the edge yet.
56:05 Sloven pushes with reavers in the shuttles and templar behind the goon line.This is the big one — Sloven commits the late-game army.
56:37 Arbiters overhead — Lorna is hunting for the stasis that ends this.This is the big one — Lorna commits the late-game army.
57:09 The two armies meet and a large battle starts to engage!Here it comes: two full armies, one engagement.
57:28 Storm on the choke — Lorna walks into it and Sloven holds comfortably.Lorna throws the endgame army in and Sloven simply refuses to lose.
57:35 It seems that Lorna only managed to destroy less than half of Sloven's army.Lorna clips Sloven's army — real damage, but Sloven fights on.
58:01 That attack didn't seem to do much damage, Sloven destroyed only less than half of Lorna's army.Sloven clips Lorna's army — real damage, but Lorna fights on.
58:21 Lorna tried to send in a shuttle but it was discovered by Sloven.Lorna goes for the raid — Sloven is ready, and nothing comes of it.
58:54 Lorna's army is small compared to Sloven!Lorna is badly outgunned — Sloven's force is a size larger.
59:20 Arbiters overhead — Sloven is hunting for the stasis that ends this.Everything Sloven has built comes forward at once.
🎙 Dead even — neither player has found the edge yet.
59:45 Archons made, storms ready, upgrades done: Lorna moves out.This is the big one — Lorna commits the late-game army.
60:06 Both armies meet at the center of the map and start attacking.The dance is over. They fight.
60:30 The battle outcome favors Sloven as Lorna's armies melt into Sloven's armies' weapon fire!A clean, brutal win for Sloven. The push continues.
60:37 It seems that Sloven only managed to destroy less than half of Lorna's army.Sloven clips Lorna's army — real damage, but Lorna fights on.
61:02 With excellent skills and micro, Sloven managed to fend off Lorna while losing less than half of his army.A cheap fight for Lorna — the losses are light.
61:22 Lorna casts some storm! But Sloven lost no workers.The sneak attack is sniffed out — Sloven shuts the door on Lorna.
61:42 Sloven moves out with his armies.Sloven has seen enough — the army moves out.
62:04 Archons made, storms ready, upgrades done: Lorna moves out.Max supply, full upgrades: Lorna moves out to end it.
62:43 The two armies clash and a large battle starts to happen!The dance is over. They fight.
🎙 The armies trade evenly; this one is still anyone's game.
63:01 With beautiful placement, Sloven successfully fends off Lorna's attacks.Sloven holds! The push breaks against a perfect defense.
63:22 With excellent skills and micro, Sloven managed to fend off Lorna while losing less than half of his army.A cheap fight for Lorna — the losses are light.
63:32 After that battle, Lorna still has most of his army with him.A cheap fight for Sloven — the losses are light.
63:55 Lorna tried to sneak in a dark templar but it was killed off before it can deal any damage to Sloven's economy.Good instincts from Sloven; the harassment dies at the doorstep.
64:22 Sloven decides to start pushing across the map.Sloven tightens the formation and starts the long walk.
64:45 Attempting to end the game, Lorna moves out with his armies.Here it comes: Lorna crosses the map with everything.
65:00 Both armies meet at the center of the map and start attacking.The dance is over. They fight.
65:42 Storm on the choke — Sloven walks into it and Lorna holds comfortably.Sloven throws the endgame army in and Lorna simply refuses to lose.
65:49 After that battle, Lorna still has most of his army with him.Sloven keeps most of his army intact through the exchange.
🎙 The armies trade evenly; this one is still anyone's game.
66:16 After that battle, Sloven still has most of his army with him.A cheap fight for Lorna — the losses are light.
66:49 Lorna's forces appear to be larger compared to Sloven's!Count the units: Lorna has the edge over Sloven right now.
67:11 Sloven pushes with reavers in the shuttles and templar behind the goon line.Max supply, full upgrades: Sloven moves out to end it.
67:18 Lorna starts pushing across the map.Here it comes: Lorna crosses the map with everything.
67:53 The two armies meet and a large battle starts to engage!Both players push to the middle of the map, and a large fight breaks out.
68:00 Lorna's archons lead the way through Sloven's line and nothing holds.There's no rebuilding from that. Lorna's late-game push decides it.
68:36 With excellent skills and micro, Sloven managed to fend off Lorna while losing less than half of his army.A cheap fight for Lorna — the losses are light.
68:51 With excellent skills and micro, Lorna managed to fend off Sloven while losing less than half of his army.A cheap fight for Sloven — the losses are light.
69:16 Sloven has carriers. In a protoss mirror that is usually the whole conversation.Max supply, full upgrades: Sloven moves out to end it.
🎙 Dead even — neither player has found the edge yet.
69:47 Archons made, storms ready, upgrades done: Lorna moves out.Max supply, full upgrades: Lorna moves out to end it.
70:03 As both armies meet, they soon start exchanging fires!Both players push to the middle of the map, and a large fight breaks out.
70:28 The battle outcome favors Lorna as Sloven's armies melt into Lorna's armies' weapon fire!The engagement breaks Sloven's way of life — Lorna marches on.
70:39 With excellent skills and micro, Sloven managed to fend off Lorna while losing less than half of his army.A cheap fight for Lorna — the losses are light.
71:04 With excellent skills and micro, Lorna managed to fend off Sloven while losing less than half of his army.A cheap fight for Sloven — the losses are light.
71:24 Arbiters overhead — Sloven is hunting for the stasis that ends this.This is the big one — Sloven commits the late-game army.
71:44 As both armies meet, they soon start exchanging fires!The armies collide — this is the fight both of them wanted.
72:11 Sloven's carriers are untouchable now and Lorna concedes the map.There's no rebuilding from that. Sloven's late-game push decides it.
72:31 That attack didn't seem to do much damage, Sloven destroyed only less than half of Lorna's army.Sloven clips Lorna's army — real damage, but Lorna fights on.
🎙 Even footing again — the tension builds.
73:03 Losing only less than half of his army, Sloven seems to be fine.Lorna keeps most of his army intact through the exchange.
73:29 Lorna tried to sneak in a dark templar but it was killed off before it can deal any damage to Sloven's economy.Lorna goes for the raid — Sloven is ready, and nothing comes of it.
73:42 Arbiters overhead — Sloven is hunting for the stasis that ends this.This is the big one — Sloven commits the late-game army.
74:05 The two armies meet and a large battle starts to engage!The armies collide — this is the fight both of them wanted.
74:33 Sloven's archons lead the way through Lorna's line and nothing holds.The final army does its work — Sloven breaks Lorna late.
74:59 Losing only less than half of his army, Lorna seems to be fine.A cheap fight for Sloven — the losses are light.
75:06 With excellent skills and micro, Sloven managed to fend off Lorna while losing less than half of his army.A cheap fight for Lorna — the losses are light.
75:27 Sloven decides to put some pressure on his opponent.Sloven has seen enough — the army moves out.
75:48 As both armies meet, they soon start exchanging fires!The dance is over. They fight.
🎙 Lorna is a step behind and knows it.
76:23 Sloven's carriers are untouchable now and Lorna concedes the map.There's no rebuilding from that. Sloven's late-game push decides it.
76:44 With excellent skills and micro, Lorna managed to fend off Sloven while losing less than half of his army.Sloven keeps most of his army intact through the exchange.
77:13 Losing only less than half of his army, Sloven seems to be fine.Lorna keeps most of his army intact through the exchange.
77:28 Lorna tried to sneak in a dark templar but it was killed off before it can deal any damage to Sloven's economy.Good instincts from Sloven; the harassment dies at the doorstep.
77:45 Sloven has carriers. In a protoss mirror that is usually the whole conversation.Everything Sloven has built comes forward at once.
78:14 Lorna having no armies left to defend, has no choice but to tap out.Lorna GGs. A hard-fought game comes to its end.
That's the game: Sloven defeats Lorna, settled in the late game.
Head to head
21 earlier meetings
Zulu
13 – 8
Crimson Reavers