Games
2 · · ▶ replay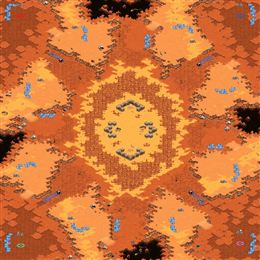
■ Shadow
■ Segovia
army value
■ Shadow
■ Segovia
economy
Play-by-play (8 lines)
0:09 Shadow spawns at s2 in White while Segovia spawns at s1 in Blue.We're underway — Shadow spawns at s2, Segovia answers from s1.
2:19 Segovia opens 9 Pool against Shadow's 14 CC.Scouting done, plans revealed: Shadow's 14 CC against Segovia's 9 Pool.
4:20 Segovia's zerglings are pushing out!Segovia goes early — pressure before either side is ready.
🎙 Segovia has built a commanding army lead — Shadow needs something special here.
6:17 Segovia decides to cheese today.Something sneaky from Segovia. This is an early gamble.
8:11 Segovia with an aggressive opening starts to attack Shadow.All or nothing: Segovia's gamble arrives at Shadow's base.
10:17 Shadow successfully defended against Segovia's aggressive play. Segovia has no armies left and taps out.Shadow holds the cheese! Segovia's gamble fails and the game opens wide.
GG. Shadow closes it out over Segovia.
■ Shadow
■ Segovia
army value
■ Shadow
■ Segovia
economy
Play-by-play (52 lines)
0:13 The game starts with Purple Shadow spawning at s4 and Teal Segovia spawning at s3.Shadow takes s4 in Purple; Segovia settles in at s3 in Teal.
0:44 Shadow gets 2 Rax FE against Segovia's 12 Pool.The builds are down: 2 Rax FE from Shadow, 12 Pool from Segovia.
— The early game —
1:10 Shadow places down a command center.Quietly, Shadow adds a base. These are the moves that decide long games.
1:48 Segovia places down a hatchery.More workers, more money: Segovia expands.
2:08 Shadow decides to start pushing across the map.Shadow has seen enough — the army moves out.
🎙 Nothing between them. One engagement could decide it.
2:53 Segovia is putting early pressure with his zerglings.Segovia goes early — pressure before either side is ready.
3:15 The battle to decide the game begins!Neither side backs off — the battle is joined.
3:46 Segovia failed to break through Shadow's marine defense line.Segovia's early gamble buys nothing — Shadow's defense was already in place.
4:22 Losing only less than half of his army, Shadow seems to be fine.Segovia keeps most of his army intact through the exchange.
4:50 With excellent skills and micro, Segovia managed to fend off Shadow while losing less than half of his army.Shadow keeps most of his army intact through the exchange.
5:17 Shadow feels confident with his marines and decides to push out.Shadow goes early — pressure before either side is ready.
5:52 Segovia's zerglings are pushing out!Segovia tests the door early. Is anyone home?
6:35 Segovia places down a hatchery.Segovia plants a new base and dares his opponent to punish it.
6:52 Both armies meet at the center of the map and start attacking.Here it comes: two full armies, one engagement.
🎙 Even footing again — the tension builds.
7:39 Segovia failed to break through Shadow's marine defense line.Shadow holds the early rush without blinking.
8:10 Losing only less than half of his army, Shadow seems to be fine.Segovia keeps most of his army intact through the exchange.
8:33 With excellent skills and micro, Segovia managed to fend off Shadow while losing less than half of his army.Shadow keeps most of his army intact through the exchange.
8:59 Shadow places down a command center.More workers, more money: Shadow expands.
9:43 Shadow starts pushing out with his marines.Shadow tests the door early. Is anyone home?
9:59 Segovia's zerglings are pushing out!Segovia goes early — pressure before either side is ready.
10:28 The two armies clash and a large battle starts to happen!The dance is over. They fight.
11:18 Segovia's mismicro cost him his zerglings and probably this game! Shadow continues pressuring with his marines!The early pressure works — Shadow breaks Segovia's front door.
11:45 Shadow only destroyed about half of Segovia's army.Shadow cuts Segovia's army in half.
🎙 Nothing between them. One engagement could decide it.
12:10 Losing only less than half of his army, Shadow seems to be fine.Segovia keeps most of his army intact through the exchange.
12:46 Segovia is in quite a huge army disadvantage, he doesn't have what it takes to win against Shadow's army.Segovia is badly outgunned — Shadow's force is a size larger.
13:22 Shadow starts pushing out with his marines.Shadow goes early — pressure before either side is ready.
13:39 Attempting to end the game, Segovia moves out with his armies.Segovia tightens the formation and starts the long walk.
14:11 The two armies meet and a large battle starts to engage!The armies collide — this is the fight both of them wanted.
14:44 All of a sudden, Segovia has no armies left while Shadow is continuing to push across the map!The engagement breaks Segovia's way of life — Shadow marches on.
15:17 Segovia has lost about half of his army in that battle.Half of Shadow's force stays on that battlefield.
15:48 Losing only less than half of his army, Shadow seems to be fine.A cheap fight for Segovia — the losses are light.
16:34 Shadow shot down Segovia's hatchery.Shadow finds the weak point and Segovia's new base is gone.
🎙 Slight advantage Shadow as the game develops.
16:58 Shadow places down a command center.Shadow takes another base — the economy widens.
17:26 Segovia places down a hatchery.Segovia plants a new base and dares his opponent to punish it.
— The mid game —
17:59 Shadow is bringing his M&M ball to pressure his opponent now!Shadow hits the timing — this push arrives exactly when it hurts.
18:37 Segovia places down a hatchery.Quietly, Segovia adds a base. These are the moves that decide long games.
— The late game —
18:58 The two armies meet and a large battle starts to engage!Both players push to the middle of the map, and a large fight breaks out.
19:37 Segovia held off Shadow's M&M group merely with the help of newly popped lurkers.The timing was right but the fight was wrong: Segovia holds Shadow.
19:55 With excellent skills and micro, Segovia managed to fend off Shadow while losing less than half of his army.A cheap fight for Shadow — the losses are light.
20:44 After that battle, Shadow still has most of his army with him.A cheap fight for Segovia — the losses are light.
21:07 What a pity! Segovia managed to sneak 1 zergling past the defense line but it was unable to deal any damage before being killed off by Shadow's army.Segovia knocks, Shadow answers. No damage done.
🎙 Slight advantage Shadow as the game develops.
21:41 Shadow is bringing his M&M ball to pressure his opponent now!The composition is ready; Shadow starts the push.
22:11 Unwilling to suffer further harassment, Segovia taps out!Nothing left to defend with — Segovia taps.
Segovia taps out. Shadow's early game was simply better.
Head to head
82 games
Shadow
30 – 52
Segovia