Friendly · Bo7 · engine v5.3
· Fri, Aug 21 2026 · 08:11 server time
Games
5 · · ▶ replay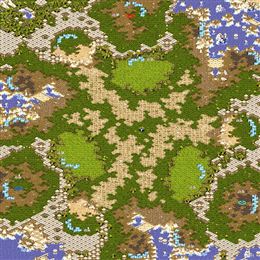
■ Trashbin
■ Garramon
army value
■ Trashbin
■ Garramon
economy
Play-by-play (224 lines)
0:07 Rohvessoori spawns in White at s1 while Garramon spawns in Orange at s2.Rohvessoori takes s1 in White; Garramon settles in at s2 in Orange.
0:25 Rohvessoori opens Forge Fast Expand against Garramon's Overpool.Rohvessoori commits to Forge Fast Expand; Garramon answers with Overpool.
— The early game —
0:59 Rohvessoori warps in a nexus.Quietly, Rohvessoori adds a base. These are the moves that decide long games.
1:17 Garramon places down a hatchery.More workers, more money: Garramon expands.
1:41 Rohvessoori is putting some early pressure on with his dragoons.Rohvessoori goes early — pressure before either side is ready.
🎙 Dead even — neither player has found the edge yet.
1:56 Garramon's speedlings rapidly push out across the map.Garramon goes early — pressure before either side is ready.
2:27 Both armies meet at the center of the map and start attacking.Neither side backs off — the battle is joined.
2:37 Garramon's mismicro cost him his zerglings and probably this game! Rohvessoori continues pressuring with his zealots and dragoons!The early pressure works — Rohvessoori breaks Garramon's front door.
3:06 That attack didn't seem to do much damage, Rohvessoori destroyed only less than half of Garramon's army.Rohvessoori takes a bite out of Garramon's force and backs off.
3:37 Losing only less than half of his army, Rohvessoori seems to be fine.A cheap fight for Garramon — the losses are light.
4:01 Rohvessoori's zealots and dragoon mixture is rolling across the map.Rohvessoori goes early — pressure before either side is ready.
4:27 Garramon's speedlings rapidly push out across the map.Garramon tests the door early. Is anyone home?
4:35 Garramon places down a hatchery.Garramon takes another base — the economy widens.
5:12 The two armies clash and a large battle starts to happen!Contact in the middle of the map. Everything is committed.
🎙 Nothing between them. One engagement could decide it.
5:19 With really nice micro, Garramon's speedlings kills off Rohvessoori's dragoons.Rohvessoori wasn't ready. Garramon's early aggression takes the lead.
5:55 Garramon destroyed less army than he should, only less than half of Rohvessoori's army has been decimated.Garramon takes a bite out of Rohvessoori's force and backs off.
6:14 With excellent skills and micro, Garramon managed to fend off Rohvessoori while losing less than half of his army.A cheap fight for Rohvessoori — the losses are light.
6:34 Rohvessoori desperate in getting his economy pumped up, expands to another location.Quietly, Rohvessoori adds a base. These are the moves that decide long games.
7:01 Rohvessoori is pushing out with his zealots.Rohvessoori tests the door early. Is anyone home?
7:20 Attempting to end the game, Garramon moves out with his armies.Garramon has seen enough — the army moves out.
7:45 The two armies clash and a large battle starts to happen!The armies collide — this is the fight both of them wanted.
7:56 Rohvessoori kills off all of Garramon's offensive zerglings with his zealots.Rohvessoori holds the early rush without blinking.
8:23 After that battle, Rohvessoori still has most of his army with him.A cheap fight for Garramon — the losses are light.
🎙 Even footing again — the tension builds.
8:39 After that battle, Garramon still has most of his army with him.A cheap fight for Rohvessoori — the losses are light.
9:17 Both Rohvessoori and Garramon appears to have equal expansions now.Base for base, they're level — Rohvessoori and Garramon match each other.
9:41 Garramon places down a hatchery.Garramon takes another base — the economy widens.
9:48 Rohvessoori's zealots and dragoon mixture is rolling across the map.Rohvessoori tests the door early. Is anyone home?
10:14 Garramon pushes out with his zerglings! It appears that these zerglings have speed upgrade!Garramon tests the door early. Is anyone home?
10:36 Rohvessoori warps in a nexus.More workers, more money: Rohvessoori expands.
11:00 Both armies meet at the center of the map and start attacking.Neither side backs off — the battle is joined.
11:16 Garramon with some nice speedling surrounds killed Rohvessoori's zealots!The early pressure works — Garramon breaks Rohvessoori's front door.
11:53 After that battle, Rohvessoori still has most of his army with him.Garramon keeps most of his army intact through the exchange.
🎙 Dead even — neither player has found the edge yet.
12:06 Losing only less than half of his army, Garramon seems to be fine.Rohvessoori keeps most of his army intact through the exchange.
12:38 Attempting to end the game, Garramon moves out with his armies.Garramon has seen enough — the army moves out.
12:46 The two armies meet and a large battle starts to engage!The armies collide — this is the fight both of them wanted.
— The mid game —
13:10 With archons and speedlots and high templars, Garramon didn't even have a chance against Rohvessoori.The timing was right but the fight was wrong: Rohvessoori holds Garramon.
13:40 With excellent skills and micro, Rohvessoori managed to fend off Garramon while losing less than half of his army.A cheap fight for Garramon — the losses are light.
13:58 After that battle, Garramon still has most of his army with him.A cheap fight for Rohvessoori — the losses are light.
14:30 Garramon places down a hatchery.Garramon takes another base — the economy widens.
14:57 Rohvessoori moves out with his armies.Rohvessoori tightens the formation and starts the long walk.
15:18 Garramon has a large number of hydralisk and is starting to push out!Garramon's hydra wave rolls out — this is the timing Zerg lives for.
🎙 The armies trade evenly; this one is still anyone's game.
15:31 Rohvessoori warps in a nexus.Quietly, Rohvessoori adds a base. These are the moves that decide long games.
15:51 The two armies meet and a large battle starts to engage!Here it comes: two full armies, one engagement.
16:22 Rohvessoori kills off Garramon's armies and continues pushing!Garramon's army evaporates. Rohvessoori doesn't even slow down.
16:48 That attack didn't seem to do much damage, Rohvessoori destroyed only less than half of Garramon's army.Rohvessoori clips Garramon's army — real damage, but Garramon fights on.
16:56 With excellent skills and micro, Rohvessoori managed to fend off Garramon while losing less than half of his army.Garramon keeps most of his army intact through the exchange.
17:28 What a pity! Garramon managed to sneak 1 zergling past the defense line but it was unable to deal any damage before being killed off by Rohvessoori's army.The sneak attack is sniffed out — Rohvessoori shuts the door on Garramon.
17:47 Rohvessoori is sniping overlords with his corsairs, and oh! His archons and speedlots are out of base as well!Rohvessoori's mid-game army is assembled — and it's moving.
18:13 As both armies meet, they soon start exchanging fires!Neither side backs off — the battle is joined.
18:33 A few beautiful storms from Rohvessoori turned the battle around! Rohvessoori won the battle!The mid-game push crashes through — Rohvessoori breaks Garramon's position.
🎙 The armies trade evenly; this one is still anyone's game.
18:47 With excellent skills and micro, Garramon managed to fend off Rohvessoori while losing less than half of his army.Rohvessoori keeps most of his army intact through the exchange.
19:16 With excellent skills and micro, Rohvessoori managed to fend off Garramon while losing less than half of his army.Garramon keeps most of his army intact through the exchange.
19:40 Garramon must macro up quickly or Rohvessoori will just roll him over!Garramon needs production, fast; Rohvessoori's army has outgrown his.
19:55 Rohvessoori starts pushing across the map.Rohvessoori tightens the formation and starts the long walk.
20:29 Garramon has a large number of hydralisk and is starting to push out!Garramon's hydra wave rolls out — this is the timing Zerg lives for.
20:47 The battle to decide the game begins!Neither side backs off — the battle is joined.
21:16 Rohvessoori's archon made a significant contribution in this battle! His observer placement was also well done!The mid-game push crashes through — Rohvessoori breaks Garramon's position.
21:34 After that battle, Garramon still has most of his army with him.A cheap fight for Rohvessoori — the losses are light.
21:52 Losing only less than half of his army, Rohvessoori seems to be fine.Garramon keeps most of his army intact through the exchange.
🎙 Nothing between them. One engagement could decide it.
22:28 Rohvessoori is sniping overlords with his corsairs, and oh! His archons and speedlots are out of base as well!Rohvessoori hits the timing — this push arrives exactly when it hurts.
22:35 Garramon brings his lurker-lings to pressure his opponent.Garramon's hydra wave rolls out — this is the timing Zerg lives for.
23:07 The two armies meet and a large battle starts to engage!Here it comes: two full armies, one engagement.
23:18 With beautiful placement, Rohvessoori successfully fends off Garramon's attacks.Garramon commits and it's the wrong call — Rohvessoori cleans it up.
23:50 With excellent skills and micro, Rohvessoori managed to fend off Garramon while losing less than half of his army.A cheap fight for Garramon — the losses are light.
24:16 It seems that Rohvessoori only managed to destroy less than half of Garramon's army.Rohvessoori clips Garramon's army — real damage, but Garramon fights on.
24:34 Rohvessoori's forces appear to be larger compared to Garramon's!Rohvessoori's army is visibly the bigger one — Garramon should not take this fight.
24:52 Attempting to end the game, Rohvessoori moves out with his armies.Rohvessoori tightens the formation and starts the long walk.
25:25 Garramon now has enough hydralisk to take the game! ... Or so he thinks.Garramon's hydra wave rolls out — this is the timing Zerg lives for.
🎙 Dead even — neither player has found the edge yet.
25:34 Both armies meet at the center of the map and start attacking.Neither side backs off — the battle is joined.
25:58 Garramon's zerglings surround Rohvessoori's archons while Garramon's lurkers deal with the rest. The outcome seems to favor Garramon!The mid-game push crashes through — Garramon breaks Rohvessoori's position.
26:35 That attack didn't seem to do much damage, Garramon destroyed only less than half of Rohvessoori's army.Garramon clips Rohvessoori's army — real damage, but Rohvessoori fights on.
26:56 Losing only less than half of his army, Garramon seems to be fine.Rohvessoori keeps most of his army intact through the exchange.
27:09 Looks like Rohvessoori is going to push out with his archons and speedlots!Rohvessoori hits the timing — this push arrives exactly when it hurts.
27:38 Garramon brings his lurker-lings to pressure his opponent.Garramon's hydra wave rolls out — this is the timing Zerg lives for.
27:48 The two armies meet and a large battle starts to engage!The armies collide — this is the fight both of them wanted.
28:29 Garramon's massive number of speedlings stopped Rohvessoori's speedlots from advancing further! Nice defense by Garramon!The timing was right but the fight was wrong: Garramon holds Rohvessoori.
28:41 With excellent skills and micro, Garramon managed to fend off Rohvessoori while losing less than half of his army.A cheap fight for Rohvessoori — the losses are light.
🎙 Even footing again — the tension builds.
29:05 With excellent skills and micro, Rohvessoori managed to fend off Garramon while losing less than half of his army.A cheap fight for Garramon — the losses are light.
29:32 Garramon tried to micro his mutalisks but they were unable to get past Rohvessoori's defense line.The sneak attack is sniffed out — Rohvessoori shuts the door on Garramon.
29:59 Garramon's army is small compared to Rohvessoori!Garramon needs production, fast; Rohvessoori's army has outgrown his.
30:09 Rohvessoori decides to move out with his armies.Here it comes: Rohvessoori crosses the map with everything.
30:28 Garramon now has enough hydralisk to take the game! ... Or so he thinks.Garramon's hydra wave rolls out — this is the timing Zerg lives for.
31:08 The two armies meet and a large battle starts to engage!The armies collide — this is the fight both of them wanted.
31:15 A few beautiful storms from Rohvessoori turned the battle around! Rohvessoori won the battle!The mid-game push crashes through — Rohvessoori breaks Garramon's position.
31:41 With excellent skills and micro, Garramon managed to fend off Rohvessoori while losing less than half of his army.Rohvessoori keeps most of his army intact through the exchange.
31:55 Garramon destroyed less army than he should, only less than half of Rohvessoori's army has been decimated.Garramon clips Rohvessoori's army — real damage, but Rohvessoori fights on.
🎙 Nothing between them. One engagement could decide it.
32:33 Looks like Rohvessoori is going to push out with his archons and speedlots!Rohvessoori hits the timing — this push arrives exactly when it hurts.
32:43 Garramon decides to put some pressure on his opponent.Garramon tightens the formation and starts the long walk.
33:03 The two armies meet and a large battle starts to engage!Here it comes: two full armies, one engagement.
33:33 Garramon failed to bring in overlords as Rohvessoori's dark templar slice through his hydralisk army!The mid-game push crashes through — Rohvessoori breaks Garramon's position.
34:05 Losing only less than half of his army, Garramon seems to be fine.Rohvessoori keeps most of his army intact through the exchange.
34:18 Garramon destroyed less army than he should, only less than half of Rohvessoori's army has been decimated.Garramon clips Rohvessoori's army — real damage, but Rohvessoori fights on.
34:47 Looks like Rohvessoori is going to push out with his archons and speedlots!Rohvessoori hits the timing — this push arrives exactly when it hurts.
35:16 Garramon now has enough hydralisk to take the game! ... Or so he thinks.Garramon's hydra wave rolls out — this is the timing Zerg lives for.
35:26 The battle to decide the game begins!Here it comes: two full armies, one engagement.
🎙 The armies trade evenly; this one is still anyone's game.
35:53 A few beautiful storms from Rohvessoori turned the battle around! Rohvessoori won the battle!The mid-game push crashes through — Rohvessoori breaks Garramon's position.
36:09 With excellent skills and micro, Garramon managed to fend off Rohvessoori while losing less than half of his army.A cheap fight for Rohvessoori — the losses are light.
36:42 With excellent skills and micro, Rohvessoori managed to fend off Garramon while losing less than half of his army.A cheap fight for Garramon — the losses are light.
37:01 Garramon's hatchery has been destroyed by Rohvessoori.No reinforcements in time: Garramon watches Rohvessoori level the expansion.
37:29 Rohvessoori warps in a nexus.Rohvessoori takes another base — the economy widens.
— The late game —
37:49 Every gateway is pumping and Rohvessoori starts walking across the map.Everything Rohvessoori has built comes forward at once.
37:57 Garramon decides to move out with his armies.Garramon has seen enough — the army moves out.
38:36 Both armies meet at the center of the map and start attacking.The armies collide — this is the fight both of them wanted.
38:51 Scourge take the corsairs, swarm takes the goons — Garramon breaks Rohvessoori wide open.There's no rebuilding from that. Garramon's late-game push decides it.
🎙 The armies trade evenly; this one is still anyone's game.
39:18 With excellent skills and micro, Rohvessoori managed to fend off Garramon while losing less than half of his army.A cheap fight for Garramon — the losses are light.
39:43 Losing only less than half of his army, Garramon seems to be fine.A cheap fight for Rohvessoori — the losses are light.
40:03 Garramon harasses Rohvessoori's economy and gets ahead of the game.The raid lands — Garramon chips away at Rohvessoori's foundation.
40:27 Rohvessoori's army is small compared to Garramon!Rohvessoori is badly outgunned — Garramon's force is a size larger.
40:37 Garramon tried to micro his mutalisks but they were unable to get past Rohvessoori's defense line.Garramon goes for the raid — Rohvessoori is ready, and nothing comes of it.
41:02 Every gateway is pumping and Rohvessoori starts walking across the map.Max supply, full upgrades: Rohvessoori moves out to end it.
41:35 As both armies meet, they soon start exchanging fires!Both players push to the middle of the map, and a large fight breaks out.
41:51 Garramon's lurkers are burrowed at the choke and Rohvessoori has no observers left. The push stalls.Garramon holds the late-game siege — what a defensive stand!
42:05 It seems that Rohvessoori only managed to destroy less than half of Garramon's army.Rohvessoori takes a bite out of Garramon's force and backs off.
🎙 Nothing between them. One engagement could decide it.
42:39 With excellent skills and micro, Rohvessoori managed to fend off Garramon while losing less than half of his army.A cheap fight for Garramon — the losses are light.
42:54 Upgrades finished and a bank of storms ready. Here comes Rohvessoori.Max supply, full upgrades: Rohvessoori moves out to end it.
43:22 Garramon moves out under dark swarm — the zealots may chase, the dragoons cannot shoot.Max supply, full upgrades: Garramon moves out to end it.
43:50 Both armies meet at the center of the map and start attacking.Neither side backs off — the battle is joined.
44:08 Rohvessoori walked into plague and swarm together. Garramon gave up nothing.Rohvessoori throws the endgame army in and Garramon simply refuses to lose.
44:38 Rohvessoori destroyed less army than he should, only less than half of Garramon's army has been decimated.Rohvessoori takes a bite out of Garramon's force and backs off.
44:49 Losing only less than half of his army, Rohvessoori seems to be fine.A cheap fight for Garramon — the losses are light.
45:09 Every gateway is pumping and Rohvessoori starts walking across the map.Max supply, full upgrades: Rohvessoori moves out to end it.
45:45 Garramon moves out under dark swarm — the zealots may chase, the dragoons cannot shoot.This is the big one — Garramon commits the late-game army.
🎙 Even footing again — the tension builds.
45:58 The battle to decide the game begins!Neither side backs off — the battle is joined.
46:21 Garramon kills off Rohvessoori's armies and continues pushing!A clean, brutal win for Garramon. The push continues.
46:41 Losing only less than half of his army, Rohvessoori seems to be fine.A cheap fight for Garramon — the losses are light.
47:01 Losing only less than half of his army, Garramon seems to be fine.A cheap fight for Rohvessoori — the losses are light.
47:31 Rohvessoori rolls out with archons and speedlots, templar trailing on full energy.Max supply, full upgrades: Rohvessoori moves out to end it.
47:55 Garramon moves out with his armies.No more waiting. Garramon pushes.
48:18 Both armies meet at the center of the map and start attacking.Here it comes: two full armies, one engagement.
48:33 Archons and speedlots hold the choke — Garramon's ultralisks cannot get through.Garramon throws the endgame army in and Rohvessoori simply refuses to lose.
49:01 That attack didn't seem to do much damage, Garramon destroyed only less than half of Rohvessoori's army.Garramon takes a bite out of Rohvessoori's force and backs off.
🎙 Dead even — neither player has found the edge yet.
49:16 With excellent skills and micro, Garramon managed to fend off Rohvessoori while losing less than half of his army.A cheap fight for Rohvessoori — the losses are light.
49:45 In terms of army size, Garramon is behind Rohvessoori!Garramon is badly outgunned — Rohvessoori's force is a size larger.
50:17 Upgrades finished and a bank of storms ready. Here comes Rohvessoori.Everything Rohvessoori has built comes forward at once.
50:24 Garramon moves out under dark swarm — the zealots may chase, the dragoons cannot shoot.Max supply, full upgrades: Garramon moves out to end it.
50:59 The two armies clash and a large battle starts to happen!Here it comes: two full armies, one engagement.
51:16 Archons and speedlots hold the choke — Garramon's ultralisks cannot get through.Garramon throws the endgame army in and Rohvessoori simply refuses to lose.
51:44 Losing only less than half of his army, Rohvessoori seems to be fine.Garramon keeps most of his army intact through the exchange.
51:59 After that battle, Garramon still has most of his army with him.A cheap fight for Rohvessoori — the losses are light.
52:14 Upgrades finished and a bank of storms ready. Here comes Rohvessoori.Max supply, full upgrades: Rohvessoori moves out to end it.
🎙 Dead even — neither player has found the edge yet.
52:54 Four hatcheries of larva pouring out at once, and Garramon pushes.This is the big one — Garramon commits the late-game army.
53:01 The two armies meet and a large battle starts to engage!Neither side backs off — the battle is joined.
53:35 Archons and speedlots hold the choke — Garramon's ultralisks cannot get through.Garramon throws the endgame army in and Rohvessoori simply refuses to lose.
53:51 Losing only less than half of his army, Rohvessoori seems to be fine.Garramon keeps most of his army intact through the exchange.
54:21 Losing only less than half of his army, Garramon seems to be fine.A cheap fight for Rohvessoori — the losses are light.
54:45 What superior Mutalisk micro from Garramon! Rohvessoori's economy is suffering!Beautiful harassment from Garramon. Rohvessoori's economy takes a real hit.
55:03 Upgrades finished and a bank of storms ready. Here comes Rohvessoori.This is the big one — Rohvessoori commits the late-game army.
55:29 Garramon moves out under dark swarm — the zealots may chase, the dragoons cannot shoot.Max supply, full upgrades: Garramon moves out to end it.
55:50 The two armies meet and a large battle starts to engage!Neither side backs off — the battle is joined.
🎙 The armies trade evenly; this one is still anyone's game.
55:58 Garramon's lurkers hold the front while the cracklings flank. Rohvessoori loses everything.There's no rebuilding from that. Garramon's late-game push decides it.
56:22 After that battle, Rohvessoori still has most of his army with him.A cheap fight for Garramon — the losses are light.
56:58 It seems that Rohvessoori only managed to destroy less than half of Garramon's army.Rohvessoori takes a bite out of Garramon's force and backs off.
57:20 Corsairs sweeping ahead, the ground army behind — Rohvessoori moves on the hatcheries.Max supply, full upgrades: Rohvessoori moves out to end it.
57:36 Plague for the templar, swarm for the choke — Garramon goes in.Max supply, full upgrades: Garramon moves out to end it.
58:08 The two armies clash and a large battle starts to happen!Here it comes: two full armies, one engagement.
58:15 Garramon's scourge take the corsairs and the speedlots die to cracklings. Rohvessoori backs off.Rohvessoori throws the endgame army in and Garramon simply refuses to lose.
58:38 With excellent skills and micro, Garramon managed to fend off Rohvessoori while losing less than half of his army.Rohvessoori keeps most of his army intact through the exchange.
58:58 It seems that Garramon only managed to destroy less than half of Rohvessoori's army.Garramon clips Rohvessoori's army — real damage, but Rohvessoori fights on.
🎙 The armies trade evenly; this one is still anyone's game.
59:22 Corsairs sweeping ahead, the ground army behind — Rohvessoori moves on the hatcheries.This is the big one — Rohvessoori commits the late-game army.
59:56 Garramon is in quite a huge army disadvantage, he doesn't have what it takes to win against Rohvessoori's army.Garramon is badly outgunned — Rohvessoori's force is a size larger.
60:12 As both armies meet, they soon start exchanging fires!The armies collide — this is the fight both of them wanted.
60:43 Garramon successfully fends off Rohvessoori's attacks.Rohvessoori commits and it's the wrong call — Garramon cleans it up.
61:09 With excellent skills and micro, Garramon managed to fend off Rohvessoori while losing less than half of his army.Rohvessoori keeps most of his army intact through the exchange.
61:16 With excellent skills and micro, Rohvessoori managed to fend off Garramon while losing less than half of his army.Garramon keeps most of his army intact through the exchange.
61:44 Unwilling to make the game too long, Rohvessoori starts moving out.Here it comes: Rohvessoori crosses the map with everything.
62:08 The two armies clash and a large battle starts to happen!Contact in the middle of the map. Everything is committed.
62:22 Rohvessoori's archons and speedlots grind through the swarm, and Garramon's defilers die with it.The final army does its work — Rohvessoori breaks Garramon late.
🎙 Dead even — neither player has found the edge yet.
63:01 With excellent skills and micro, Garramon managed to fend off Rohvessoori while losing less than half of his army.A cheap fight for Rohvessoori — the losses are light.
63:09 After that battle, Rohvessoori still has most of his army with him.Garramon keeps most of his army intact through the exchange.
63:45 Every gateway is pumping and Rohvessoori starts walking across the map.This is the big one — Rohvessoori commits the late-game army.
64:08 Both armies meet at the center of the map and start attacking.Both players push to the middle of the map, and a large fight breaks out.
64:19 Rohvessoori's archons and speedlots grind through the swarm, and Garramon's defilers die with it.The final army does its work — Rohvessoori breaks Garramon late.
64:51 After that battle, Garramon still has most of his army with him.A cheap fight for Rohvessoori — the losses are light.
65:07 That attack didn't seem to do much damage, Garramon destroyed only less than half of Rohvessoori's army.Garramon takes a bite out of Rohvessoori's force and backs off.
65:38 Garramon is in a slight disadvantage as he has less expansions than Rohvessoori.Garramon needs an expansion soon or Rohvessoori's economy simply wins this.
65:58 Corsairs sweeping ahead, the ground army behind — Rohvessoori moves on the hatcheries.Max supply, full upgrades: Rohvessoori moves out to end it.
🎙 Trashbin holds the stronger army for now.
66:15 Both armies meet at the center of the map and start attacking.The armies collide — this is the fight both of them wanted.
66:39 All of a sudden, Garramon has no armies left while Rohvessoori is continuing to push across the map!A clean, brutal win for Rohvessoori. The push continues.
67:01 Losing only less than half of his army, Garramon seems to be fine.A cheap fight for Rohvessoori — the losses are light.
67:18 With excellent skills and micro, Rohvessoori managed to fend off Garramon while losing less than half of his army.A cheap fight for Garramon — the losses are light.
67:39 Every gateway is pumping and Rohvessoori starts walking across the map.Everything Rohvessoori has built comes forward at once.
68:00 The battle to decide the game begins!Neither side backs off — the battle is joined.
68:39 The corsairs cleared the sky and Rohvessoori's ground army does the rest to Garramon.There's no rebuilding from that. Rohvessoori's late-game push decides it.
69:03 Rohvessoori destroyed less army than he should, only less than half of Garramon's army has been decimated.Rohvessoori clips Garramon's army — real damage, but Garramon fights on.
69:16 Losing only less than half of his army, Rohvessoori seems to be fine.A cheap fight for Garramon — the losses are light.
🎙 Trashbin edges ahead on army strength.
69:31 What superior Mutalisk micro from Garramon! Rohvessoori's economy is suffering!Beautiful harassment from Garramon. Rohvessoori's economy takes a real hit.
70:10 Upgrades finished and a bank of storms ready. Here comes Rohvessoori.Max supply, full upgrades: Rohvessoori moves out to end it.
70:21 As both armies meet, they soon start exchanging fires!Both players push to the middle of the map, and a large fight breaks out.
70:47 The battle outcome favors Rohvessoori as Garramon's armies melt into Rohvessoori's armies' weapon fire!The engagement breaks Garramon's way of life — Rohvessoori marches on.
71:03 With excellent skills and micro, Garramon managed to fend off Rohvessoori while losing less than half of his army.Rohvessoori keeps most of his army intact through the exchange.
71:40 Losing only less than half of his army, Rohvessoori seems to be fine.A cheap fight for Garramon — the losses are light.
71:47 Rohvessoori starts pushing across the map.Here it comes: Rohvessoori crosses the map with everything.
72:20 The two armies clash and a large battle starts to happen!The dance is over. They fight.
72:41 The corsairs cleared the sky and Rohvessoori's ground army does the rest to Garramon.The final army does its work — Rohvessoori breaks Garramon late.
🎙 Trashbin's force dwarfs what Garramon has left on the field.
72:52 After that battle, Garramon still has most of his army with him.Rohvessoori keeps most of his army intact through the exchange.
73:33 With excellent skills and micro, Rohvessoori managed to fend off Garramon while losing less than half of his army.Garramon keeps most of his army intact through the exchange.
73:40 Every gateway is pumping and Rohvessoori starts walking across the map.This is the big one — Rohvessoori commits the late-game army.
74:07 After suffering a devastating loss in the battle, Garramon GGs!Garramon GGs. A hard-fought game comes to its end.
Garramon taps out. Trashbin's late game was simply better.
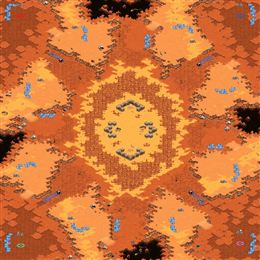
■ Trashbin
■ Garramon
army value
■ Trashbin
■ Garramon
economy
Play-by-play (48 lines)
0:07 Garramon spawns in Green at s4 while Rohvessoori spawns in Purple at s1.Cross positions or close ones, it starts here: Garramon at s4, Rohvessoori at s1.
0:46 Rohvessoori opens Forge Fast Expand against Garramon's 12 Pool.The builds are down: 12 Pool from Garramon, Forge Fast Expand from Rohvessoori.
— The early game —
1:15 Garramon places down a hatchery.Garramon plants a new base and dares his opponent to punish it.
1:55 Rohvessoori warps in a nexus.Rohvessoori takes another base — the economy widens.
2:18 Garramon is bringing his speedlings out for a walk and maybe decide to kill enemy units on the way.Garramon goes early — pressure before either side is ready.
🎙 Dead even — neither player has found the edge yet.
2:44 Rohvessoori's zealots and dragoon mixture is rolling across the map.Rohvessoori tests the door early. Is anyone home?
3:21 Both armies meet at the center of the map and start attacking.The dance is over. They fight.
3:57 Rohvessoori kills off all of Garramon's offensive zerglings with his zealots.Rohvessoori holds the early rush without blinking.
4:38 After that battle, Rohvessoori still has most of his army with him.A cheap fight for Garramon — the losses are light.
4:57 Losing only less than half of his army, Garramon seems to be fine.A cheap fight for Rohvessoori — the losses are light.
5:43 Garramon's speedlings rapidly push out across the map.Garramon goes early — pressure before either side is ready.
6:09 Unwilling to make the game too long, Rohvessoori starts moving out.Here it comes: Rohvessoori crosses the map with everything.
6:32 Rohvessoori warps in a nexus.Rohvessoori takes another base — the economy widens.
7:14 Both armies meet at the center of the map and start attacking.Here it comes: two full armies, one engagement.
🎙 Trashbin edges ahead on army strength.
7:33 Rohvessoori kills off all of Garramon's offensive zerglings with his zealots.Garramon's early gamble buys nothing — Rohvessoori's defense was already in place.
8:08 It seems that Garramon only managed to destroy less than half of Rohvessoori's army.Garramon clips Rohvessoori's army — real damage, but Rohvessoori fights on.
8:53 After that battle, Garramon still has most of his army with him.A cheap fight for Rohvessoori — the losses are light.
9:22 Rohvessoori is pushing out with his zealots.No patience from Rohvessoori: the first units are already marching.
— The mid game —
9:46 Garramon places down a hatchery.Garramon plants a new base and dares his opponent to punish it.
10:26 The two armies meet and a large battle starts to engage!Neither side backs off — the battle is joined.
10:59 Rohvessoori kills off Garramon's speedlings with his zealots and dragoons!Garramon wasn't ready. Rohvessoori's early aggression takes the lead.
11:22 After that battle, Garramon still has most of his army with him.A cheap fight for Rohvessoori — the losses are light.
12:04 After that battle, Rohvessoori still has most of his army with him.A cheap fight for Garramon — the losses are light.
🎙 Garramon is a step behind and knows it.
12:24 Rohvessoori is pushing out with his zealots.Rohvessoori tests the door early. Is anyone home?
13:14 Garramon is in quite a huge army disadvantage, he doesn't have what it takes to win against Rohvessoori's army.Garramon is badly outgunned — Rohvessoori's force is a size larger.
13:32 As both armies meet, they soon start exchanging fires!Neither side backs off — the battle is joined.
14:05 Rohvessoori kills off Garramon's speedlings with his zealots and dragoons!The early pressure works — Rohvessoori breaks Garramon's front door.
14:52 Garramon has lost about half of his army in that battle.Half of Rohvessoori's force stays on that battlefield.
15:14 After that battle, Rohvessoori still has most of his army with him.A cheap fight for Garramon — the losses are light.
15:50 Rohvessoori desperate in getting his economy pumped up, expands to another location.Quietly, Rohvessoori adds a base. These are the moves that decide long games.
— The late game —
16:14 Rohvessoori is pushing out with his zealots.Rohvessoori tests the door early. Is anyone home?
16:54 Garramon places down a hatchery.Garramon takes another base — the economy widens.
🎙 It's all going Trashbin's way right now.
17:28 Both armies meet at the center of the map and start attacking.The armies collide — this is the fight both of them wanted.
17:50 Garramon's mismicro cost him his zerglings and probably this game! Rohvessoori continues pressuring with his zealots and dragoons!The early pressure works — Rohvessoori breaks Garramon's front door.
18:26 Garramon lost more than half of his army in that battle.Rohvessoori limps away with less than half the army he arrived with.
18:58 With excellent skills and micro, Rohvessoori managed to fend off Garramon while losing less than half of his army.A cheap fight for Garramon — the losses are light.
19:39 Rohvessoori shot down Garramon's hatchery.Garramon's expansion burns — Rohvessoori tears it down.
20:04 Garramon places down a hatchery.More workers, more money: Garramon expands.
20:47 Rohvessoori starts pushing across the map.No more waiting. Rohvessoori pushes.
21:19 After suffering a devastating loss in the battle, Garramon GGs!Garramon GGs. A hard-fought game comes to its end.
Garramon taps out. Trashbin's early game was simply better.
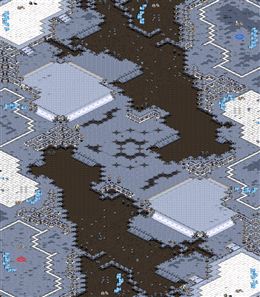
■ Trashbin
■ Garramon
army value
■ Trashbin
■ Garramon
economy
Play-by-play (178 lines)
0:19 Rohvessoori spawns at s1 in Teal while Garramon spawns at s2 in Red.We're underway — Rohvessoori spawns at s1, Garramon answers from s2.
0:34 Rohvessoori opens Forge Fast Expand against Garramon's Overpool.The builds are down: Forge Fast Expand from Rohvessoori, Overpool from Garramon.
— The early game —
0:55 Rohvessoori warps in a nexus.Rohvessoori plants a new base and dares his opponent to punish it.
1:16 Garramon places down a hatchery.Garramon takes another base — the economy widens.
1:41 Rohvessoori decides to move out with his armies.No more waiting. Rohvessoori pushes.
🎙 Even footing again — the tension builds.
2:00 Garramon's speedlings rapidly push out across the map.No patience from Garramon: the first units are already marching.
2:37 The two armies meet and a large battle starts to engage!Both players push to the middle of the map, and a large fight breaks out.
2:50 All of a sudden, Rohvessoori has no armies left while Garramon is continuing to push across the map!Rohvessoori's army evaporates. Garramon doesn't even slow down.
3:12 Garramon destroyed less army than he should, only less than half of Rohvessoori's army has been decimated.Garramon clips Rohvessoori's army — real damage, but Rohvessoori fights on.
3:34 With excellent skills and micro, Garramon managed to fend off Rohvessoori while losing less than half of his army.A cheap fight for Rohvessoori — the losses are light.
4:03 Garramon places down a hatchery.Quietly, Garramon adds a base. These are the moves that decide long games.
4:16 Rohvessoori is putting some early pressure on with his dragoons.Rohvessoori tests the door early. Is anyone home?
4:40 Garramon is bringing his speedlings out for a walk and maybe decide to kill enemy units on the way.Garramon goes early — pressure before either side is ready.
5:16 Garramon must macro up quickly or Rohvessoori will just roll him over!Garramon is badly outgunned — Rohvessoori's force is a size larger.
🎙 The armies trade evenly; this one is still anyone's game.
5:26 Rohvessoori warps in a nexus.Rohvessoori plants a new base and dares his opponent to punish it.
6:05 The battle to decide the game begins!Contact in the middle of the map. Everything is committed.
6:22 Rohvessoori failed to kill off Garramon's defending zerglings.Rohvessoori's early gamble buys nothing — Garramon's defense was already in place.
6:48 Losing only less than half of his army, Garramon seems to be fine.A cheap fight for Rohvessoori — the losses are light.
7:02 After that battle, Rohvessoori still has most of his army with him.Garramon keeps most of his army intact through the exchange.
7:29 Rohvessoori starts pushing across the map.Here it comes: Rohvessoori crosses the map with everything.
7:46 Garramon pushes out with his zerglings! It appears that these zerglings have speed upgrade!Garramon tests the door early. Is anyone home?
8:11 The battle to decide the game begins!The dance is over. They fight.
8:41 Garramon failed to kill off Rohvessoori's defending zealots.Garramon's early gamble buys nothing — Rohvessoori's defense was already in place.
🎙 Dead even — neither player has found the edge yet.
9:00 After that battle, Rohvessoori still has most of his army with him.A cheap fight for Garramon — the losses are light.
9:14 Rohvessoori destroyed less army than he should, only less than half of Garramon's army has been decimated.Rohvessoori clips Garramon's army — real damage, but Garramon fights on.
9:38 Garramon places down a hatchery.Quietly, Garramon adds a base. These are the moves that decide long games.
10:07 Rohvessoori's zealots and dragoon mixture is rolling across the map.Rohvessoori goes early — pressure before either side is ready.
10:29 Garramon's speedlings rapidly push out across the map.No patience from Garramon: the first units are already marching.
10:55 Rohvessoori warps in a nexus.Rohvessoori plants a new base and dares his opponent to punish it.
11:12 The two armies clash and a large battle starts to happen!Both players push to the middle of the map, and a large fight breaks out.
11:34 Garramon lost all of his zerglings to Rohvessoori's zealots and dragoons!Garramon wasn't ready. Rohvessoori's early aggression takes the lead.
12:04 It seems that Rohvessoori only managed to destroy less than half of Garramon's army.Rohvessoori clips Garramon's army — real damage, but Garramon fights on.
🎙 Even footing again — the tension builds.
12:22 Garramon destroyed less army than he should, only less than half of Rohvessoori's army has been decimated.Garramon clips Rohvessoori's army — real damage, but Rohvessoori fights on.
— The mid game —
12:57 With corsairs sniping overlords, Rohvessoori is bringing his dark templar to attack his opponent!Rohvessoori hits the timing — this push arrives exactly when it hurts.
13:08 Garramon brings his lurker-lings to pressure his opponent.Garramon's hydra wave rolls out — this is the timing Zerg lives for.
13:34 It seems like Garramon has more units than Rohvessoori!Count the units: Garramon has the edge over Rohvessoori right now.
14:01 Garramon places down a hatchery.Garramon takes another base — the economy widens.
14:15 The two armies clash and a large battle starts to happen!Both players push to the middle of the map, and a large fight breaks out.
14:46 Rohvessoori tried to break into Garramon's base, but a few sunkens in combination with beautiful building placement stopped Rohvessoori!The timing was right but the fight was wrong: Garramon holds Rohvessoori.
15:08 It seems that Rohvessoori only managed to destroy less than half of Garramon's army.Rohvessoori clips Garramon's army — real damage, but Garramon fights on.
15:43 Losing only less than half of his army, Rohvessoori seems to be fine.A cheap fight for Garramon — the losses are light.
🎙 Nothing between them. One engagement could decide it.
16:02 Reaver! Reaver! Rohvessoori's reaver is killing off most of Garramon's workers!The raid lands — Rohvessoori chips away at Garramon's foundation.
16:12 Rohvessoori starts expanding.Rohvessoori plants a new base and dares his opponent to punish it.
16:43 Rohvessoori decides to put some pressure on his opponent.Rohvessoori tightens the formation and starts the long walk.
16:59 Garramon brings his lurker-lings to pressure his opponent.Garramon's hydra wave rolls out — this is the timing Zerg lives for.
17:25 Both armies meet at the center of the map and start attacking.Here it comes: two full armies, one engagement.
17:41 Rohvessoori failed to deal nicely with Garramon's lurkers, his few fail storms cost him this battle and this army.Rohvessoori's defense bends, then snaps. Garramon takes the middle of the game.
18:07 After that battle, Rohvessoori still has most of his army with him.Garramon keeps most of his army intact through the exchange.
18:38 With excellent skills and micro, Garramon managed to fend off Rohvessoori while losing less than half of his army.A cheap fight for Rohvessoori — the losses are light.
19:03 Where is Garramon's detector? Rohvessoori sends dark templars to harass Garramon's mineral line!Beautiful harassment from Rohvessoori. Garramon's economy takes a real hit.
🎙 Nothing between them. One engagement could decide it.
19:21 Garramon places down a hatchery.Quietly, Garramon adds a base. These are the moves that decide long games.
19:55 Rohvessoori tried to sneak in a dark templar but it was killed off before it can deal any damage to Garramon's economy.Rohvessoori goes for the raid — Garramon is ready, and nothing comes of it.
20:08 Garramon has a large number of hydralisk and is starting to push out!Garramon's hydra wave rolls out — this is the timing Zerg lives for.
20:43 Rohvessoori warps in a nexus.More workers, more money: Rohvessoori expands.
20:52 The battle to decide the game begins!Both players push to the middle of the map, and a large fight breaks out.
21:09 Garramon's scourge sniped a few of Rohvessoori's observers! Rohvessoori can't deal with the lurkers and lost the battle!The mid-game push crashes through — Garramon breaks Rohvessoori's position.
21:43 That attack didn't seem to do much damage, Garramon destroyed only less than half of Rohvessoori's army.Garramon takes a bite out of Rohvessoori's force and backs off.
22:10 With excellent skills and micro, Garramon managed to fend off Rohvessoori while losing less than half of his army.A cheap fight for Rohvessoori — the losses are light.
22:22 Rohvessoori casts some storm! But Garramon lost no workers.Rohvessoori goes for the raid — Garramon is ready, and nothing comes of it.
🎙 The armies trade evenly; this one is still anyone's game.
22:44 Zerglings ran past Rohvessoori's defense line and start harassing the mineral line! What a nice run-by by Garramon!Garramon gets into Rohvessoori's mineral line — workers are dying.
23:15 Rohvessoori tried to sneak in a dark templar but it was killed off before it can deal any damage to Garramon's economy.Good instincts from Garramon; the harassment dies at the doorstep.
23:46 Garramon has a large number of hydralisk and is starting to push out!Garramon's hydra wave rolls out — this is the timing Zerg lives for.
24:07 Garramon places down a hatchery.Garramon takes another base — the economy widens.
24:20 The two armies clash and a large battle starts to happen!Contact in the middle of the map. Everything is committed.
24:53 Garramon failed to focus down on high templars and the few storm on Garramon's hydralisks really hurts a lot! Garramon is backing off!The timing was right but the fight was wrong: Rohvessoori holds Garramon.
25:15 Losing only less than half of his army, Rohvessoori seems to be fine.Garramon keeps most of his army intact through the exchange.
25:26 It seems that Rohvessoori only managed to destroy less than half of Garramon's army.Rohvessoori clips Garramon's army — real damage, but Garramon fights on.
25:51 In terms of army size, Garramon is behind Rohvessoori!Garramon is badly outgunned — Rohvessoori's force is a size larger.
🎙 Even footing again — the tension builds.
26:18 Rohvessoori warps in a nexus.Rohvessoori plants a new base and dares his opponent to punish it.
26:36 Where is Garramon's detector? Rohvessoori sends dark templars to harass Garramon's mineral line!The raid lands — Rohvessoori chips away at Garramon's foundation.
27:07 Garramon now has enough hydralisk to take the game! ... Or so he thinks.Garramon's hydra wave rolls out — this is the timing Zerg lives for.
27:22 As both armies meet, they soon start exchanging fires!The armies collide — this is the fight both of them wanted.
27:44 Rohvessoori successfully fends off Garramon's attacks.Garramon commits and it's the wrong call — Rohvessoori cleans it up.
28:13 With excellent skills and micro, Rohvessoori managed to fend off Garramon while losing less than half of his army.Garramon keeps most of his army intact through the exchange.
28:38 After that battle, Garramon still has most of his army with him.A cheap fight for Rohvessoori — the losses are light.
29:01 Rohvessoori tried to sneak in a dark templar but it was killed off before it can deal any damage to Garramon's economy.The sneak attack is sniffed out — Garramon shuts the door on Rohvessoori.
29:29 Garramon places down a hatchery.Garramon takes another base — the economy widens.
🎙 Dead even — neither player has found the edge yet.
29:46 Garramon brings his lurker-lings to pressure his opponent.Garramon's hydra wave rolls out — this is the timing Zerg lives for.
30:01 Rohvessoori warps in a nexus.Quietly, Rohvessoori adds a base. These are the moves that decide long games.
30:23 The two armies meet and a large battle starts to engage!The armies collide — this is the fight both of them wanted.
31:00 Garramon's scourge sniped a few of Rohvessoori's observers! Rohvessoori can't deal with the lurkers and lost the battle!The mid-game push crashes through — Garramon breaks Rohvessoori's position.
31:27 With excellent skills and micro, Rohvessoori managed to fend off Garramon while losing less than half of his army.A cheap fight for Garramon — the losses are light.
31:44 Losing only less than half of his army, Garramon seems to be fine.A cheap fight for Rohvessoori — the losses are light.
32:06 Where is Garramon's detector? Rohvessoori sends dark templars to harass Garramon's mineral line!The raid lands — Rohvessoori chips away at Garramon's foundation.
32:23 Rohvessoori tried to sneak in a dark templar but it was killed off before it can deal any damage to Garramon's economy.Rohvessoori knocks, Garramon answers. No damage done.
32:59 Garramon brings his lurker-lings to pressure his opponent.Garramon's hydra wave rolls out — this is the timing Zerg lives for.
🎙 The armies trade evenly; this one is still anyone's game.
33:15 The two armies clash and a large battle starts to happen!The armies collide — this is the fight both of them wanted.
33:32 Garramon's combination of lurkers and hydralisks totally decimated Rohvessoori's army.Rohvessoori's defense bends, then snaps. Garramon takes the middle of the game.
34:05 After that battle, Rohvessoori still has most of his army with him.A cheap fight for Garramon — the losses are light.
34:23 With excellent skills and micro, Garramon managed to fend off Rohvessoori while losing less than half of his army.A cheap fight for Rohvessoori — the losses are light.
34:53 Rohvessoori tried to sneak in a dark templar but it was killed off before it can deal any damage to Garramon's economy.Rohvessoori knocks, Garramon answers. No damage done.
35:16 Rohvessoori tried to sneak in a dark templar but it was killed off before it can deal any damage to Garramon's economy.Rohvessoori goes for the raid — Garramon is ready, and nothing comes of it.
35:40 Garramon decides to move out with his armies.Here it comes: Garramon crosses the map with everything.
35:47 The battle to decide the game begins!The armies collide — this is the fight both of them wanted.
36:11 Rohvessoori successfully fends off Garramon's attacks.The attack shatters on Rohvessoori's line. Great positioning.
🎙 Nothing between them. One engagement could decide it.
36:37 Losing only less than half of his army, Rohvessoori seems to be fine.A cheap fight for Garramon — the losses are light.
36:57 It seems that Rohvessoori only managed to destroy less than half of Garramon's army.Rohvessoori takes a bite out of Garramon's force and backs off.
37:35 Rohvessoori tried to sneak in a dark templar but it was killed off before it can deal any damage to Garramon's economy.Good instincts from Garramon; the harassment dies at the doorstep.
38:00 Rohvessoori is in quite a huge army disadvantage, he doesn't have what it takes to win against Garramon's army.Rohvessoori is badly outgunned — Garramon's force is a size larger.
38:14 Looks like Rohvessoori is going to push out with his archons and speedlots!Rohvessoori hits the timing — this push arrives exactly when it hurts.
38:42 Garramon brings his lurker-lings to pressure his opponent.Garramon's hydra wave rolls out — this is the timing Zerg lives for.
39:07 Both armies meet at the center of the map and start attacking.Contact in the middle of the map. Everything is committed.
39:29 Garramon scourged some of Rohvessoori's annoying corsairs, and kills off majority of the speedlots with his lurkers!The timing was right but the fight was wrong: Garramon holds Rohvessoori.
39:51 With excellent skills and micro, Garramon managed to fend off Rohvessoori while losing less than half of his army.Rohvessoori keeps most of his army intact through the exchange.
🎙 Dead even — neither player has found the edge yet.
40:20 Losing only less than half of his army, Rohvessoori seems to be fine.A cheap fight for Garramon — the losses are light.
40:33 Looks like Rohvessoori is going to push out with his archons and speedlots!Rohvessoori hits the timing — this push arrives exactly when it hurts.
40:51 Garramon has a large number of hydralisk and is starting to push out!Garramon's hydra wave rolls out — this is the timing Zerg lives for.
41:10 The battle to decide the game begins!The armies collide — this is the fight both of them wanted.
41:41 Rohvessoori tried to break into Garramon's base, but a few sunkens in combination with beautiful building placement stopped Rohvessoori!The timing was right but the fight was wrong: Garramon holds Rohvessoori.
41:55 That attack didn't seem to do much damage, Rohvessoori destroyed only less than half of Garramon's army.Rohvessoori clips Garramon's army — real damage, but Garramon fights on.
42:25 That attack didn't seem to do much damage, Garramon destroyed only less than half of Rohvessoori's army.Garramon takes a bite out of Rohvessoori's force and backs off.
42:56 Rohvessoori decides to start pushing across the map.Rohvessoori has seen enough — the army moves out.
43:10 Garramon moves out with his armies.Garramon tightens the formation and starts the long walk.
🎙 Even footing again — the tension builds.
43:28 Currently, neither Rohvessoori nor Garramon appears to be leading in economy.The economies mirror one another. Nothing between Rohvessoori and Garramon yet.
43:52 Both armies meet at the center of the map and start attacking.The dance is over. They fight.
— The late game —
44:27 Garramon's lurkers are burrowed at the choke and Rohvessoori has no observers left. The push stalls.Garramon holds the late-game siege — what a defensive stand!
44:50 Losing only less than half of his army, Garramon seems to be fine.Rohvessoori keeps most of his army intact through the exchange.
45:01 After that battle, Rohvessoori still has most of his army with him.Garramon keeps most of his army intact through the exchange.
45:29 Rohvessoori casts some storm! But Garramon lost no workers.Good instincts from Garramon; the harassment dies at the doorstep.
45:46 Rohvessoori casts some storm! But Garramon lost no workers.The sneak attack is sniffed out — Garramon shuts the door on Rohvessoori.
46:23 Garramon moves out under dark swarm — the zealots may chase, the dragoons cannot shoot.This is the big one — Garramon commits the late-game army.
46:50 The battle to decide the game begins!Contact in the middle of the map. Everything is committed.
🎙 Nothing between them. One engagement could decide it.
47:01 Garramon kills off Rohvessoori's armies and continues pushing!Garramon wins the fight convincingly and keeps rolling forward.
47:38 With excellent skills and micro, Rohvessoori managed to fend off Garramon while losing less than half of his army.Garramon keeps most of his army intact through the exchange.
47:50 With excellent skills and micro, Garramon managed to fend off Rohvessoori while losing less than half of his army.A cheap fight for Rohvessoori — the losses are light.
48:09 Reaver! Reaver! Rohvessoori's reaver is killing off most of Garramon's workers!Rohvessoori gets into Garramon's mineral line — workers are dying.
48:42 Corsairs sweeping ahead, the ground army behind — Rohvessoori moves on the hatcheries.Max supply, full upgrades: Rohvessoori moves out to end it.
48:51 Ultralisks and cracklings with defilers behind: Garramon commits to the break.This is the big one — Garramon commits the late-game army.
49:14 As both armies meet, they soon start exchanging fires!Contact in the middle of the map. Everything is committed.
49:49 The battle outcome favors Garramon as Rohvessoori's armies melt into Garramon's armies' weapon fire!Garramon wins the fight convincingly and keeps rolling forward.
50:14 Rohvessoori has lost about half of his army in that battle.Garramon pays for that trade with about half his army.
🎙 The armies trade evenly; this one is still anyone's game.
50:36 With excellent skills and micro, Garramon managed to fend off Rohvessoori while losing less than half of his army.A cheap fight for Rohvessoori — the losses are light.
51:01 Rohvessoori's nexus has been destroyed by Garramon.The base falls. Garramon rips Rohvessoori's economy back a full step.
51:22 Rohvessoori casts some storm! But Garramon lost no workers.The sneak attack is sniffed out — Garramon shuts the door on Rohvessoori.
51:52 Rohvessoori warps in a nexus.Quietly, Rohvessoori adds a base. These are the moves that decide long games.
52:01 Attempting to end the game, Garramon moves out with his armies.No more waiting. Garramon pushes.
52:19 As both armies meet, they soon start exchanging fires!Contact in the middle of the map. Everything is committed.
52:49 Plague on the templar, and Garramon's ultralisks walk straight through Rohvessoori.The final army does its work — Garramon breaks Rohvessoori late.
53:24 That attack didn't seem to do much damage, Garramon destroyed only less than half of Rohvessoori's army.Garramon takes a bite out of Rohvessoori's force and backs off.
53:34 That attack didn't seem to do much damage, Rohvessoori destroyed only less than half of Garramon's army.Rohvessoori takes a bite out of Garramon's force and backs off.
🎙 The armies trade evenly; this one is still anyone's game.
53:58 Garramon has been very lucky to scout the incoming harassment by Rohvessoori.No surprises today — Garramon's harassment is scouted early.
54:19 Garramon scouted the attempt but Rohvessoori is still going with it!Rohvessoori wanted to raid — instead he's pinned at home, defending.
54:37 Aaaaaa, Garramon's mineral line is stormed by Rohvessoori's high templars!Beautiful harassment from Rohvessoori. Garramon's economy takes a real hit.
55:04 Eager to end the game, Garramon moves out with his armies.Here it comes: Garramon crosses the map with everything.
55:30 The two armies meet and a large battle starts to engage!The armies collide — this is the fight both of them wanted.
56:01 The battle outcome favors Garramon as Rohvessoori's armies melt into Garramon's armies' weapon fire!The engagement breaks Rohvessoori's way of life — Garramon marches on.
56:28 About half of Rohvessoori's army has been decimated in that battle.Garramon pays for that trade with about half his army.
56:50 After that battle, Garramon still has most of his army with him.A cheap fight for Rohvessoori — the losses are light.
57:07 Rohvessoori casts some storm! But Garramon lost no workers.Rohvessoori goes for the raid — Garramon is ready, and nothing comes of it.
🎙 Garramon holds the stronger army for now.
57:22 Plague for the templar, swarm for the choke — Garramon goes in.Everything Garramon has built comes forward at once.
57:50 As both armies meet, they soon start exchanging fires!Neither side backs off — the battle is joined.
58:17 Scourge take the corsairs, swarm takes the goons — Garramon breaks Rohvessoori wide open.There's no rebuilding from that. Garramon's late-game push decides it.
58:30 Garramon destroyed about half of Rohvessoori's army after that battle.Garramon cuts Rohvessoori's army in half.
58:52 With excellent skills and micro, Garramon managed to fend off Rohvessoori while losing less than half of his army.A cheap fight for Rohvessoori — the losses are light.
59:19 Garramon destroys Rohvessoori's nexus, denying expansions.No reinforcements in time: Rohvessoori watches Garramon level the expansion.
59:51 Four hatcheries of larva pouring out at once, and Garramon pushes.Max supply, full upgrades: Garramon moves out to end it.
60:11 Rohvessoori having no armies left to defend, has no choice but to tap out.Rohvessoori GGs. A hard-fought game comes to its end.
GG. Garramon closes it out over Trashbin.
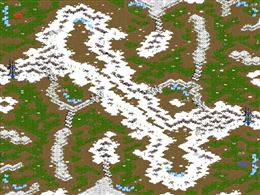
■ Trashbin
■ Garramon
army value
■ Trashbin
■ Garramon
economy
Play-by-play (55 lines)
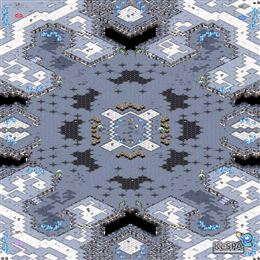
0:20 The game starts with White Garramon spawning at s1 and Yellow Rohvessoori spawning at s2.Garramon takes s1 in White; Rohvessoori settles in at s2 in Yellow.
0:36 Rohvessoori opens Forge Fast Expand against Garramon's 12 Pool.Garramon commits to 12 Pool; Rohvessoori answers with Forge Fast Expand.
— The early game —
1:06 Garramon places down a hatchery.Garramon takes another base — the economy widens.
1:38 Rohvessoori warps in a nexus.Rohvessoori plants a new base and dares his opponent to punish it.
2:14 Garramon is bringing his speedlings out for a walk and maybe decide to kill enemy units on the way.Garramon goes early — pressure before either side is ready.
🎙 Nothing between them. One engagement could decide it.
2:42 Eager to end the game, Rohvessoori moves out with his armies.Rohvessoori has seen enough — the army moves out.
3:18 The two armies clash and a large battle starts to happen!Contact in the middle of the map. Everything is committed.
3:40 All of a sudden, Garramon has no armies left while Rohvessoori is continuing to push across the map!A clean, brutal win for Rohvessoori. The push continues.
4:18 That attack didn't seem to do much damage, Rohvessoori destroyed only less than half of Garramon's army.Rohvessoori takes a bite out of Garramon's force and backs off.
4:49 After that battle, Rohvessoori still has most of his army with him.Garramon keeps most of his army intact through the exchange.
5:21 Garramon places down a hatchery.Garramon plants a new base and dares his opponent to punish it.
5:50 Rohvessoori warps in a nexus.Rohvessoori takes another base — the economy widens.
6:21 Garramon pushes out with his zerglings! It appears that these zerglings have speed upgrade!No patience from Garramon: the first units are already marching.
6:47 Rohvessoori is putting some early pressure on with his dragoons.Rohvessoori goes early — pressure before either side is ready.
🎙 The armies trade evenly; this one is still anyone's game.
7:09 The battle to decide the game begins!The armies collide — this is the fight both of them wanted.
7:42 Rohvessoori kills off all of Garramon's offensive zerglings with his zealots.Garramon's early gamble buys nothing — Rohvessoori's defense was already in place.
8:27 After that battle, Rohvessoori still has most of his army with him.Garramon keeps most of his army intact through the exchange.
8:45 It seems that Rohvessoori only managed to destroy less than half of Garramon's army.Rohvessoori takes a bite out of Garramon's force and backs off.
9:32 Garramon is in quite a huge army disadvantage, he doesn't have what it takes to win against Rohvessoori's army.Garramon is badly outgunned — Rohvessoori's force is a size larger.
9:43 Garramon pushes out with his zerglings! It appears that these zerglings have speed upgrade!No patience from Garramon: the first units are already marching.
10:14 Unwilling to make the game too long, Rohvessoori starts moving out.Rohvessoori has seen enough — the army moves out.
11:03 As both armies meet, they soon start exchanging fires!Neither side backs off — the battle is joined.
11:20 Garramon failed to kill off Rohvessoori's defending zealots.Garramon's early gamble buys nothing — Rohvessoori's defense was already in place.
🎙 Slight advantage Trashbin as the game develops.
12:00 Losing only less than half of his army, Rohvessoori seems to be fine.Garramon keeps most of his army intact through the exchange.
12:18 With excellent skills and micro, Garramon managed to fend off Rohvessoori while losing less than half of his army.A cheap fight for Rohvessoori — the losses are light.
12:46 Rohvessoori decides to start pushing across the map.No more waiting. Rohvessoori pushes.
13:21 Rohvessoori warps in a nexus.Rohvessoori takes another base — the economy widens.
14:05 The two armies meet and a large battle starts to engage!Contact in the middle of the map. Everything is committed.
14:35 All of a sudden, Garramon has no armies left while Rohvessoori is continuing to push across the map!A clean, brutal win for Rohvessoori. The push continues.
15:03 With excellent skills and micro, Garramon managed to fend off Rohvessoori while losing less than half of his army.Rohvessoori keeps most of his army intact through the exchange.
15:23 Losing only less than half of his army, Rohvessoori seems to be fine.A cheap fight for Garramon — the losses are light.
15:58 Garramon decides to expand.Garramon plants a new base and dares his opponent to punish it.
🎙 The scales tip toward Trashbin — a lead, but not a safe one.
16:32 Rohvessoori's zealots and dragoon mixture is rolling across the map.Rohvessoori tests the door early. Is anyone home?
16:52 The two armies meet and a large battle starts to engage!Both players push to the middle of the map, and a large fight breaks out.
— The mid game —
17:34 Garramon failed to bring in overlords as Rohvessoori's dark templar slice through his hydralisk army!The mid-game push crashes through — Rohvessoori breaks Garramon's position.
18:05 Garramon has lost about half of his army in that battle.Half of Rohvessoori's force stays on that battlefield.
— The late game —
18:27 After that battle, Rohvessoori still has most of his army with him.Garramon keeps most of his army intact through the exchange.
19:07 Unwilling to make the game too long, Rohvessoori starts moving out.Rohvessoori tightens the formation and starts the long walk.
19:38 Garramon's number of expansions are equal to Rohvessoori's.The economies mirror one another. Nothing between Garramon and Rohvessoori yet.
20:14 Both armies meet at the center of the map and start attacking.Both players push to the middle of the map, and a large fight breaks out.
20:30 Garramon failed to bring in overlords as Rohvessoori's dark templar slice through his hydralisk army!The mid-game push crashes through — Rohvessoori breaks Garramon's position.
🎙 Trashbin has built a commanding army lead — Garramon needs something special here.
21:17 Garramon lost more than half of his army in that battle.That fight gutted Rohvessoori — more than half the force is gone.
21:29 With excellent skills and micro, Rohvessoori managed to fend off Garramon while losing less than half of his army.Garramon keeps most of his army intact through the exchange.
22:09 Rohvessoori destroys Garramon's hatchery, denying expansions.The base falls. Rohvessoori rips Garramon's economy back a full step.
22:42 Unwilling to make the game too long, Rohvessoori starts moving out.No more waiting. Rohvessoori pushes.
23:17 Garramon having no armies left to defend, has no choice but to tap out.Nothing left to defend with — Garramon taps.
Trashbin takes it — the mid game decided this one.
■ Trashbin
■ Garramon
army value
■ Trashbin
■ Garramon
economy
Play-by-play (47 lines)
0:11 Rohvessoori spawns at s2 in Purple while Garramon spawns at s1 in Teal.Rohvessoori in Purple at s2. Garramon in Teal at s1. The map is set.
0:33 Garramon opens 12 Hatch against Rohvessoori's Forge Fast Expand.Rohvessoori commits to Forge Fast Expand; Garramon answers with 12 Hatch.
— The early game —
1:19 Rohvessoori warps in a nexus.Rohvessoori takes another base — the economy widens.
1:40 Garramon starts expanding.Garramon plants a new base and dares his opponent to punish it.
2:23 Rohvessoori decides to start pushing across the map.No more waiting. Rohvessoori pushes.
🎙 The armies trade evenly; this one is still anyone's game.
2:53 Garramon's speedlings rapidly push out across the map.No patience from Garramon: the first units are already marching.
3:32 The battle to decide the game begins!Contact in the middle of the map. Everything is committed.
4:03 Garramon failed to break Rohvessoori's defending line of zealots.Garramon's early gamble buys nothing — Rohvessoori's defense was already in place.
4:35 After that battle, Rohvessoori still has most of his army with him.Garramon keeps most of his army intact through the exchange.
5:06 That attack didn't seem to do much damage, Rohvessoori destroyed only less than half of Garramon's army.Rohvessoori takes a bite out of Garramon's force and backs off.
5:33 Rohvessoori warps in a nexus.More workers, more money: Rohvessoori expands.
6:23 Garramon places down a hatchery.Quietly, Garramon adds a base. These are the moves that decide long games.
6:57 Rohvessoori is putting some early pressure on with his dragoons.Rohvessoori tests the door early. Is anyone home?
7:28 Garramon's speedlings rapidly push out across the map.No patience from Garramon: the first units are already marching.
🎙 Dead even — neither player has found the edge yet.
7:54 The battle to decide the game begins!The armies collide — this is the fight both of them wanted.
8:32 Garramon failed to kill off Rohvessoori's defending zealots.Garramon's early gamble buys nothing — Rohvessoori's defense was already in place.
9:07 That attack didn't seem to do much damage, Garramon destroyed only less than half of Rohvessoori's army.Garramon clips Rohvessoori's army — real damage, but Rohvessoori fights on.
— The mid game —
9:24 Garramon lost about half of his army in that battle.Rohvessoori pays for that trade with about half his army.
10:04 Rohvessoori is pushing out with his zealots.Rohvessoori goes early — pressure before either side is ready.
10:38 Garramon's speedlings rapidly push out across the map.Garramon goes early — pressure before either side is ready.
11:17 Both armies meet at the center of the map and start attacking.The armies collide — this is the fight both of them wanted.
11:51 Rohvessoori successfully fends off Garramon's attacks.Rohvessoori takes the fight on his terms and sends Garramon home with nothing.
12:26 Losing only less than half of his army, Rohvessoori seems to be fine.Garramon keeps most of his army intact through the exchange.
🎙 Garramon is a step behind and knows it.
12:42 With excellent skills and micro, Garramon managed to fend off Rohvessoori while losing less than half of his army.Rohvessoori keeps most of his army intact through the exchange.
13:29 Rohvessoori's forces appear to be larger compared to Garramon's!Count the units: Rohvessoori has the edge over Garramon right now.
14:00 Rohvessoori starts expanding.More workers, more money: Rohvessoori expands.
14:24 Garramon places down a hatchery.Quietly, Garramon adds a base. These are the moves that decide long games.
15:10 Rohvessoori is pushing out with his zealots.Rohvessoori tests the door early. Is anyone home?
15:41 The two armies meet and a large battle starts to engage!Here it comes: two full armies, one engagement.
— The late game —
16:15 Rohvessoori kills off Garramon's speedlings with his zealots and dragoons!The early pressure works — Rohvessoori breaks Garramon's front door.
16:52 Garramon lost about half of his army in that battle.Half of Rohvessoori's force stays on that battlefield.
17:26 That attack didn't seem to do much damage, Garramon destroyed only less than half of Rohvessoori's army.Garramon takes a bite out of Rohvessoori's force and backs off.
🎙 The scales tip toward Trashbin — a lead, but not a safe one.
17:58 Rohvessoori is pushing out with his zealots.Rohvessoori goes early — pressure before either side is ready.
18:24 The two armies clash and a large battle starts to happen!Contact in the middle of the map. Everything is committed.
19:03 Rohvessoori kills off Garramon's armies and continues pushing!Rohvessoori wins the fight convincingly and keeps rolling forward.
19:29 Rohvessoori destroyed about half of Garramon's army after that battle.Rohvessoori cuts Garramon's army in half.
20:06 Losing only less than half of his army, Rohvessoori seems to be fine.Garramon keeps most of his army intact through the exchange.
20:36 Garramon's expansion have been wiped off by Rohvessoori!The base falls. Rohvessoori rips Garramon's economy back a full step.
21:02 Unwilling to suffer further harassment, Garramon taps out!Nothing left to defend with — Garramon taps.
GG. Trashbin closes it out over Garramon.
Head to head
28 games
Trashbin
24 – 4
Garramon