← Junior Starleague Season 1
Junior Starleague · Season 1 · Round of 256 · Bo1 · Week 4
Madman 🛡️
1 – 0
Hangar
Games
1 · ▶ replay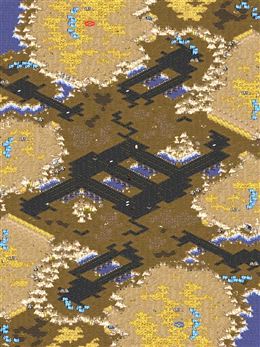
■ Madman
■ Hangar
army value
■ Madman
■ Hangar
economy
Battle report ▾
Play-by-play (46 lines)
0:08 The game starts with Purple Hangar spawning at s1 and Yellow Madman spawning at s2.We're underway — Hangar spawns at s1, Madman answers from s2.
0:44 Hangar gets 2 Gate Goons against Madman's Deep Six.Scouting done, plans revealed: Hangar's 2 Gate Goons against Madman's Deep Six.
— The early game —
1:20 Hangar warps in a nexus.More workers, more money: Hangar expands.
1:38 Madman places down a command center.Quietly, Madman adds a base. These are the moves that decide long games.
2:26 Hangar is pushing out with his dragoons.Hangar tests the door early. Is anyone home?
🎙 Even footing again — the tension builds.
2:59 Madman figures he has enough vultures to put on early pressure on his opponent so he decides to push out.Madman tests the door early. Is anyone home?
3:25 The battle to decide the game begins!The dance is over. They fight.
4:04 Hangar failed to kill off Madman's defending marines.Madman holds the early rush without blinking.
4:31 After that battle, Madman still has most of his army with him.Hangar keeps most of his army intact through the exchange.
5:08 Hangar has lost about half of his army in that battle.Half of Madman's force stays on that battlefield.
5:26 It seems like Madman has more units than Hangar!Madman's army is visibly the bigger one — Hangar should not take this fight.
6:06 Hangar starts pushing across the map.Here it comes: Hangar crosses the map with everything.
6:43 Madman bravely pushes out with his marines and vultures.Madman tests the door early. Is anyone home?
7:17 Hangar warps in a nexus.Quietly, Hangar adds a base. These are the moves that decide long games.
🎙 The armies trade evenly; this one is still anyone's game.
7:39 Madman places down a command center.Madman takes another base — the economy widens.
8:23 Both armies meet at the center of the map and start attacking.Contact in the middle of the map. Everything is committed.
8:49 With beautiful placement, Madman successfully fends off Hangar's attacks.Madman holds! The push breaks against a perfect defense.
9:16 After that battle, Madman still has most of his army with him.Hangar keeps most of his army intact through the exchange.
9:54 After that battle, Hangar still has most of his army with him.A cheap fight for Madman — the losses are light.
10:21 Madman figures he has enough vultures to put on early pressure on his opponent so he decides to push out.Madman tests the door early. Is anyone home?
11:02 As both armies meet, they soon start exchanging fires!Contact in the middle of the map. Everything is committed.
11:29 Madman successfully kills off Hangar's dragoons with nice marine micro.The early pressure works — Madman breaks Hangar's front door.
🎙 The armies are no longer comparable: Madman is far ahead.
11:56 Hangar has lost about half of his army in that battle.Madman pays for that trade with about half his army.
12:43 After that battle, Madman still has most of his army with him.Hangar keeps most of his army intact through the exchange.
13:11 Madman decides to put on early pressure on his opponent by bringing out his marines.No patience from Madman: the first units are already marching.
13:50 Hangar warps in a nexus.More workers, more money: Hangar expands.
14:16 Madman places down a command center.Quietly, Madman adds a base. These are the moves that decide long games.
14:35 Both armies meet at the center of the map and start attacking.Neither side backs off — the battle is joined.
15:21 With really nice micro, Madman kills off Hangar's dragoons.The early pressure works — Madman breaks Hangar's front door.
🎙 The armies are no longer comparable: Madman is far ahead.
15:55 The attack was a success, Hangar lost more than half of his army in that battle.That fight gutted Madman — more than half the force is gone.
16:31 After that battle, Madman still has most of his army with him.A cheap fight for Hangar — the losses are light.
16:54 Hangar is putting on early pressure with his dragoon.Hangar tests the door early. Is anyone home?
17:27 Madman bravely pushes out with his marines and vultures.No patience from Madman: the first units are already marching.
18:00 As both armies meet, they soon start exchanging fires!Here it comes: two full armies, one engagement.
— The mid game —
18:34 Fortunately enough for Madman, he positioned some tanks at the high ground, and it paid off by killing most of Hangar's armies and saved his base from wrecking havoc!The timing was right but the fight was wrong: Madman holds Hangar.
19:05 After that battle, Madman still has most of his army with him.Hangar keeps most of his army intact through the exchange.
— The late game —
19:33 The attack was a success, Hangar lost more than half of his army in that battle.That fight gutted Madman — more than half the force is gone.
20:15 Unwilling to suffer further harassment, Hangar taps out!Hangar types it out: GG.
GG. Madman closes it out over Hangar.