← Junior Starleague Season 1
Junior Starleague · Season 1 · Round of 256 · Bo1 · Week 4
Buzzcut
0 – 1
Beware TGL
Games
1 · ▶ replay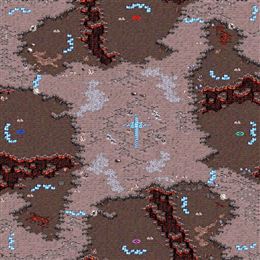
■ Buzzcut
■ Beware
army value
■ Buzzcut
■ Beware
economy
Battle report ▾
Play-by-play (48 lines)
0:19 The game starts with Yellow Buzzcut spawning at s2 and Green Beware spawning at s3.Cross positions or close ones, it starts here: Buzzcut at s2, Beware at s3.
0:40 Beware gets One Fact FE against Buzzcut's One Fact FE.Buzzcut commits to One Fact FE; Beware answers with One Fact FE.
— The early game —
1:15 Buzzcut decides to expand.Buzzcut plants a new base and dares his opponent to punish it.
1:38 Beware places down a command center.Beware takes another base — the economy widens.
2:28 Buzzcut figures he has enough vultures to put on early pressure on his opponent so he decides to push out.Buzzcut slides the first vultures across the map — early mines, early pressure.
🎙 Nothing between them. One engagement could decide it.
2:41 Beware bravely pushes out with his marines and vultures.Beware slides the first vultures across the map — early mines, early pressure.
3:18 The two armies meet and a large battle starts to engage!Both players push to the middle of the map, and a large fight breaks out.
3:48 Buzzcut failed to kill off Beware's defending marines.Buzzcut's early gamble buys nothing — Beware's defense was already in place.
4:31 That attack didn't seem to do much damage, Buzzcut destroyed only less than half of Beware's army.Buzzcut takes a bite out of Beware's force and backs off.
5:10 Losing only less than half of his army, Buzzcut seems to be fine.Beware keeps most of his army intact through the exchange.
5:23 Buzzcut moves out with his armies.No more waiting. Buzzcut pushes.
6:13 Beware figures he has enough vultures to put on early pressure on his opponent so he decides to push out.Beware slides the first vultures across the map — early mines, early pressure.
6:43 Buzzcut places down a command center.Buzzcut plants a new base and dares his opponent to punish it.
7:03 Beware places down a command center.Beware takes another base — the economy widens.
🎙 Dead even — neither player has found the edge yet.
7:46 The two armies clash and a large battle starts to happen!Here it comes: two full armies, one engagement.
8:16 Nice marine placement by Beware, Buzzcut can't even find a hole to poke through with his marines.Buzzcut's early gamble buys nothing — Beware's defense was already in place.
8:47 With excellent skills and micro, Beware managed to fend off Buzzcut while losing less than half of his army.A cheap fight for Buzzcut — the losses are light.
9:12 Buzzcut has lost about half of his army in that battle.Beware pays for that trade with about half his army.
9:54 Beware decides to put on early pressure on his opponent by bringing out his marines.Beware slides the first vultures across the map — early mines, early pressure.
10:25 As both armies meet, they soon start exchanging fires!Both players push to the middle of the map, and a large fight breaks out.
10:52 With enough marines, Beware kills off Buzzcut's defending marines.The early pressure works — Beware breaks Buzzcut's front door.
11:22 Buzzcut has lost about half of his army in that battle.Beware pays for that trade with about half his army.
11:59 After that battle, Beware still has most of his army with him.A cheap fight for Buzzcut — the losses are light.
🎙 Buzzcut is a step behind and knows it.
12:27 In terms of army size, Buzzcut is behind Beware!Buzzcut is badly outgunned — Beware's force is a size larger.
13:15 Beware decides to put on early pressure on his opponent by bringing out his marines.Beware slides the first vultures across the map — early mines, early pressure.
13:29 The battle to decide the game begins!Both players push to the middle of the map, and a large fight breaks out.
14:16 All of a sudden, Buzzcut has no armies left while Beware is continuing to push across the map!The engagement breaks Buzzcut's way of life — Beware marches on.
14:34 About half of Buzzcut's army has been decimated in that battle.Half of Beware's force stays on that battlefield.
15:22 With excellent skills and micro, Beware managed to fend off Buzzcut while losing less than half of his army.A cheap fight for Buzzcut — the losses are light.
15:37 Beware shot down Buzzcut's command center.Beware finds the weak point and Buzzcut's new base is gone.
16:17 Buzzcut places down a command center.Buzzcut takes another base — the economy widens.
17:01 Beware decides to put on early pressure on his opponent by bringing out his marines.Beware slides the first vultures across the map — early mines, early pressure.
🎙 Beware has built a commanding army lead — Buzzcut needs something special here.
17:33 Beware places down a command center.Beware takes another base — the economy widens.
18:00 The two armies clash and a large battle starts to happen!Both players push to the middle of the map, and a large fight breaks out.
— The mid game —
18:33 Buzzcut doesn't have enough sieged up tanks in position and Beware uses his number advantage to break Buzzcut's defenses!Buzzcut's defense bends, then snaps. Beware takes the middle of the game.
19:06 Buzzcut seems to lose most of his army in that battle.Beware limps away with less than half the army he arrived with.
— The late game —
19:35 Losing only less than half of his army, Beware seems to be fine.A cheap fight for Buzzcut — the losses are light.
19:57 Buzzcut's command center has been destroyed by Beware.The base falls. Beware rips Buzzcut's economy back a full step.
20:44 Beware's vulture-tank ball is getting large, and it starts to roll out of the base!Beware's tank line crawls forward — siege by siege, the map shrinks.
21:13 Unwilling to suffer further harassment, Buzzcut taps out!Nothing left to defend with — Buzzcut taps.
GG. Beware closes it out over Buzzcut.