← Amateur Division 3
Amateur League · Amateur Division 3 · Season 1 · Round 1 · Bo5
· Tue, Aug 4 2026 · 16:00 server time
Games
4 · · ▶ replay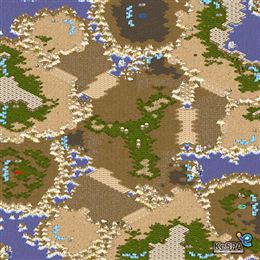
■ Segue
■ Kohlrabi
army value
■ Segue
■ Kohlrabi
economy
Play-by-play (48 lines)
0:12 Segue spawns at s2 in Purple while Kohlrabi spawns at s1 in White.Segue in Purple at s2. Kohlrabi in White at s1. The map is set.
0:45 Kohlrabi gets 1 Gate Cybernetics against Segue's 1 Gate Cybernetics.Segue commits to 1 Gate Cybernetics; Kohlrabi answers with 1 Gate Cybernetics.
— The early game —
1:05 Segue warps in a nexus.Segue takes another base — the economy widens.
1:46 Kohlrabi warps in a nexus.Kohlrabi plants a new base and dares his opponent to punish it.
2:10 Eager to end the game, Segue moves out with his armies.Segue has seen enough — the army moves out.
🎙 Nothing between them. One engagement could decide it.
2:57 Kohlrabi is putting on early pressure with his dragoon.Kohlrabi tests the door early. Is anyone home?
3:27 As both armies meet, they soon start exchanging fires!Neither side backs off — the battle is joined.
3:53 Kohlrabi kills off all of Segue's offensive dragoons.Kohlrabi holds the early rush without blinking.
4:30 It seems that Segue only managed to destroy less than half of Kohlrabi's army.Segue clips Kohlrabi's army — real damage, but Kohlrabi fights on.
5:03 With excellent skills and micro, Segue managed to fend off Kohlrabi while losing less than half of his army.Kohlrabi keeps most of his army intact through the exchange.
5:41 Segue is pushing out with his dragoons.No patience from Segue: the first units are already marching.
6:13 Kohlrabi decides to push out with his dragoon.Kohlrabi goes early — pressure before either side is ready.
6:38 Segue decides to expand.Quietly, Segue adds a base. These are the moves that decide long games.
7:00 Kohlrabi warps in a nexus.More workers, more money: Kohlrabi expands.
🎙 The scales tip toward Kohlrabi — a lead, but not a safe one.
7:44 The battle to decide the game begins!Here it comes: two full armies, one engagement.
8:20 Segue failed to kill off Kohlrabi's defending dragoons.Segue's early gamble buys nothing — Kohlrabi's defense was already in place.
8:43 After that battle, Kohlrabi still has most of his army with him.Segue keeps most of his army intact through the exchange.
9:18 Segue lost about half of his army in that battle.Half of Kohlrabi's force stays on that battlefield.
— The mid game —
9:57 Segue decides to push out with his dragoon.No patience from Segue: the first units are already marching.
10:15 Kohlrabi is putting on early pressure with his dragoon.No patience from Kohlrabi: the first units are already marching.
10:48 The two armies meet and a large battle starts to engage!Here it comes: two full armies, one engagement.
11:27 Kohlrabi successfully fends off Segue's attacks.Kohlrabi takes the fight on his terms and sends Segue home with nothing.
12:07 After that battle, Kohlrabi still has most of his army with him.Segue keeps most of his army intact through the exchange.
🎙 Kohlrabi has built a commanding army lead — Segue needs something special here.
12:42 About half of Segue's army has been decimated in that battle.Half of Kohlrabi's force stays on that battlefield.
12:55 Kohlrabi decides to push out with his dragoon.Kohlrabi tests the door early. Is anyone home?
13:47 Both Segue and Kohlrabi appears to have equal expansions now.Base for base, they're level — Segue and Kohlrabi match each other.
14:18 Segue warps in a nexus.More workers, more money: Segue expands.
14:45 Kohlrabi warps in a nexus.Quietly, Kohlrabi adds a base. These are the moves that decide long games.
15:23 The battle to decide the game begins!The armies collide — this is the fight both of them wanted.
15:49 The battle outcome favors Kohlrabi as Segue's armies melt into Kohlrabi's armies' weapon fire!A clean, brutal win for Kohlrabi. The push continues.
— The late game —
16:15 Segue lost about half of his army in that battle.Kohlrabi pays for that trade with about half his army.
16:50 After that battle, Kohlrabi still has most of his army with him.A cheap fight for Segue — the losses are light.
🎙 The armies are no longer comparable: Kohlrabi is far ahead.
17:33 Kohlrabi is pushing out with his dragoons.No patience from Kohlrabi: the first units are already marching.
17:53 Both armies meet at the center of the map and start attacking.The dance is over. They fight.
18:29 Kohlrabi kills off Segue's armies and continues pushing!A clean, brutal win for Kohlrabi. The push continues.
18:51 Segue lost more than half of his army in that battle.That fight gutted Kohlrabi — more than half the force is gone.
19:38 After that battle, Kohlrabi still has most of his army with him.Segue keeps most of his army intact through the exchange.
20:06 Kohlrabi destroys Segue's nexus, denying expansions.The base falls. Kohlrabi rips Segue's economy back a full step.
20:43 Kohlrabi moves out with his armies.Kohlrabi has seen enough — the army moves out.
21:07 Looking at the opponent's overwhelming forces, Segue GGs!Segue GGs. A hard-fought game comes to its end.
GG. Kohlrabi closes it out over Segue.
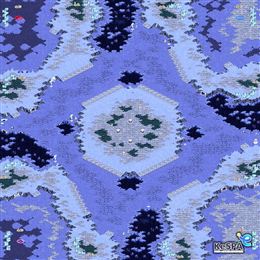
■ Radio
■ Jumpily
army value
■ Radio
■ Jumpily
economy
Play-by-play (46 lines)
0:10 Radio spawns at s3 in Yellow while Jumpily spawns at s2 in White.We're underway — Radio spawns at s3, Jumpily answers from s2.
0:40 Jumpily gets 12 Pool against Radio's 2 Rax FE.The builds are down: 2 Rax FE from Radio, 12 Pool from Jumpily.
— The early game —
1:13 Radio places down a command center.More workers, more money: Radio expands.
1:42 Jumpily places down a hatchery.Quietly, Jumpily adds a base. These are the moves that decide long games.
2:09 Radio starts pushing out with his marines.Radio goes early — pressure before either side is ready.
🎙 Nothing between them. One engagement could decide it.
2:49 Jumpily's zerglings are pushing out!Jumpily goes early — pressure before either side is ready.
3:23 The two armies clash and a large battle starts to happen!Contact in the middle of the map. Everything is committed.
4:00 Nice placement by Jumpily, Radio can't even find a hole to poke through with his marines.Jumpily holds the early rush without blinking.
4:39 With excellent skills and micro, Jumpily managed to fend off Radio while losing less than half of his army.Radio keeps most of his army intact through the exchange.
5:02 About half of Radio's army has been decimated in that battle.Half of Jumpily's force stays on that battlefield.
5:42 Unwilling to make the game too long, Radio starts moving out.No more waiting. Radio pushes.
6:16 Jumpily is putting early pressure with his zerglings.Jumpily goes early — pressure before either side is ready.
6:33 Currently, neither Radio nor Jumpily appears to be leading in economy.Base for base, they're level — Radio and Jumpily match each other.
7:13 Radio places down a command center.More workers, more money: Radio expands.
🎙 The armies trade evenly; this one is still anyone's game.
7:37 Jumpily places down a hatchery.Jumpily plants a new base and dares his opponent to punish it.
8:20 The two armies clash and a large battle starts to happen!Contact in the middle of the map. Everything is committed.
8:44 Jumpily's zerglings surround Radio's marines and kills it off!Radio wasn't ready. Jumpily's early aggression takes the lead.
9:14 With excellent skills and micro, Radio managed to fend off Jumpily while losing less than half of his army.Jumpily keeps most of his army intact through the exchange.
9:46 Radio destroyed less army than he should, only less than half of Jumpily's army has been decimated.Radio takes a bite out of Jumpily's force and backs off.
10:29 Jumpily is putting early pressure with his zerglings.No patience from Jumpily: the first units are already marching.
11:04 The two armies clash and a large battle starts to happen!Both players push to the middle of the map, and a large fight breaks out.
11:30 Mismicro from Radio gave opportunity to Jumpily! Jumpily is still pushing and putting pressure with his zerglings!Radio wasn't ready. Jumpily's early aggression takes the lead.
12:05 About half of Radio's army has been decimated in that battle.Half of Jumpily's force stays on that battlefield.
🎙 The scales tip toward Jumpily — a lead, but not a safe one.
12:34 It seems that Radio only managed to destroy less than half of Jumpily's army.Radio clips Jumpily's army — real damage, but Jumpily fights on.
12:58 Jumpily with a large number of zerglings starts pushing out.No patience from Jumpily: the first units are already marching.
13:31 Radio places down a command center.Quietly, Radio adds a base. These are the moves that decide long games.
14:09 Jumpily places down a hatchery.More workers, more money: Jumpily expands.
14:55 Both armies meet at the center of the map and start attacking.Here it comes: two full armies, one engagement.
15:08 Nice control from Jumpily! He killed Radio's marines and continues pressuring!Radio wasn't ready. Jumpily's early aggression takes the lead.
15:40 About half of Radio's army has been decimated in that battle.Half of Jumpily's force stays on that battlefield.
16:15 It seems that Radio only managed to destroy less than half of Jumpily's army.Radio takes a bite out of Jumpily's force and backs off.
17:04 Jumpily is putting early pressure with his zerglings.Jumpily tests the door early. Is anyone home?
🎙 Slight advantage Jumpily as the game develops.
17:18 The battle to decide the game begins!Neither side backs off — the battle is joined.
— The mid game —
18:05 Radio seems to have run out of scans! Jumpily's lurkers cleans up the remaining army!The mid-game push crashes through — Jumpily breaks Radio's position.
18:36 Jumpily destroyed about half of Radio's army after that battle.Jumpily cuts Radio's army in half.
— The late game —
19:09 With excellent skills and micro, Jumpily managed to fend off Radio while losing less than half of his army.Radio keeps most of his army intact through the exchange.
19:36 Attempting to end the game, Jumpily moves out with his armies.Jumpily has seen enough — the army moves out.
20:16 Radio having no armies left to defend, has no choice but to tap out.Radio GGs. A hard-fought game comes to its end.
Jumpily takes it — the mid game decided this one.
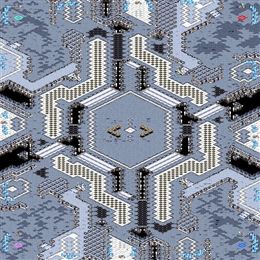
■ Spelt
■ Casework
army value
■ Spelt
■ Casework
economy
Play-by-play (47 lines)
0:07 Spelt spawns at s1 in Yellow while Casework spawns at s3 in Green.Cross positions or close ones, it starts here: Spelt at s1, Casework at s3.
0:48 Casework gets One Fact FE against Spelt's One Fact FE.The builds are down: One Fact FE from Spelt, One Fact FE from Casework.
— The early game —
1:19 Spelt places down a command center.More workers, more money: Spelt expands.
1:55 Casework desperate in getting his economy pumped up, expands to another location.Quietly, Casework adds a base. These are the moves that decide long games.
2:30 Spelt bravely pushes out with his marines and vultures.Spelt slides the first vultures across the map — early mines, early pressure.
🎙 The armies trade evenly; this one is still anyone's game.
2:50 Casework decides to move out with his armies.Here it comes: Casework crosses the map with everything.
3:22 The two armies meet and a large battle starts to engage!The dance is over. They fight.
4:12 Nice marine placement by Spelt, Casework can't even find a hole to poke through with his marines.Spelt holds the early rush without blinking.
4:38 With excellent skills and micro, Spelt managed to fend off Casework while losing less than half of his army.Casework keeps most of his army intact through the exchange.
5:10 Spelt destroyed less army than he should, only less than half of Casework's army has been decimated.Spelt takes a bite out of Casework's force and backs off.
5:44 Casework's army is small compared to Spelt!Casework needs production, fast; Spelt's army has outgrown his.
6:22 Spelt figures he has enough vultures to put on early pressure on his opponent so he decides to push out.Spelt slides the first vultures across the map — early mines, early pressure.
6:56 Casework figures he has enough vultures to put on early pressure on his opponent so he decides to push out.Casework slides the first vultures across the map — early mines, early pressure.
7:13 Spelt places down a command center.Spelt plants a new base and dares his opponent to punish it.
🎙 Dead even — neither player has found the edge yet.
8:00 Casework places down a command center.More workers, more money: Casework expands.
8:30 As both armies meet, they soon start exchanging fires!Both players push to the middle of the map, and a large fight breaks out.
9:09 With enough marines, Spelt successfully defend against Casework's marines.Spelt holds the early rush without blinking.
— The mid game —
9:31 After that battle, Spelt still has most of his army with him.Casework keeps most of his army intact through the exchange.
10:11 Spelt destroyed less army than he should, only less than half of Casework's army has been decimated.Spelt clips Casework's army — real damage, but Casework fights on.
10:37 Spelt bravely pushes out with his marines and vultures.Spelt slides the first vultures across the map — early mines, early pressure.
11:03 Casework bravely pushes out with his marines and vultures.Casework slides the first vultures across the map — early mines, early pressure.
11:38 Both armies meet at the center of the map and start attacking.Both players push to the middle of the map, and a large fight breaks out.
12:13 Casework was out-microed by Spelt and loses all his attacking forces.Spelt holds! The push breaks against a perfect defense.
🎙 Casework is a step behind and knows it.
12:54 Losing only less than half of his army, Spelt seems to be fine.Casework keeps most of his army intact through the exchange.
13:24 About half of Casework's army has been decimated in that battle.Half of Spelt's force stays on that battlefield.
14:03 Unwilling to make the game too long, Spelt starts moving out.Here it comes: Spelt crosses the map with everything.
14:23 Casework places down a command center.Casework plants a new base and dares his opponent to punish it.
15:04 As both armies meet, they soon start exchanging fires!Neither side backs off — the battle is joined.
15:32 Nice marine micro! Spelt kills off Casework's marines and forces Casework to pull some SCVs!The early pressure works — Spelt breaks Casework's front door.
— The late game —
16:14 Casework has lost about half of his army in that battle.Spelt pays for that trade with about half his army.
16:38 Losing only less than half of his army, Spelt seems to be fine.A cheap fight for Casework — the losses are light.
17:08 Spelt bravely pushes out with his marines and vultures.Spelt slides the first vultures across the map — early mines, early pressure.
🎙 Spelt's force dwarfs what Casework has left on the field.
17:45 Spelt places down a command center.Spelt plants a new base and dares his opponent to punish it.
18:31 The battle to decide the game begins!Here it comes: two full armies, one engagement.
18:57 Spelt showed some epic marine micro, Casework lost all of his fighting marines!The early pressure works — Spelt breaks Casework's front door.
19:28 About half of Casework's army has been decimated in that battle.Spelt pays for that trade with about half his army.
20:04 Losing only less than half of his army, Spelt seems to be fine.Casework keeps most of his army intact through the exchange.
20:26 Spelt bravely pushes out with his marines and vultures.Spelt slides the first vultures across the map — early mines, early pressure.
21:18 Casework having no armies left to defend, has no choice but to tap out.Casework types it out: GG.
GG. Spelt closes it out over Casework.
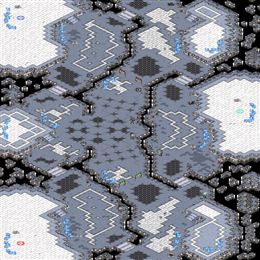
■ Terrify
■ Gleason
army value
■ Terrify
■ Gleason
economy
Play-by-play (142 lines)
0:20 The Red Terrify spawns at s2 while Blue Gleason spawns at s3.Terrify in Red at s2. Gleason in Blue at s3. The map is set.
0:29 Terrify opens 2 Rax FE against Gleason's 12 Pool.Scouting done, plans revealed: Terrify's 2 Rax FE against Gleason's 12 Pool.
— The early game —
1:01 Terrify places down a command center.Terrify plants a new base and dares his opponent to punish it.
1:29 Gleason places down a hatchery.Gleason takes another base — the economy widens.
1:53 Terrify starts pushing out with his marines.Terrify goes early — pressure before either side is ready.
🎙 Nothing between them. One engagement could decide it.
2:03 Gleason is putting early pressure with his zerglings.No patience from Gleason: the first units are already marching.
2:28 As both armies meet, they soon start exchanging fires!The dance is over. They fight.
2:52 Terrify failed to kill off Gleason's defending zerglings.Terrify's early gamble buys nothing — Gleason's defense was already in place.
3:11 Losing only less than half of his army, Gleason seems to be fine.A cheap fight for Terrify — the losses are light.
3:43 About half of Terrify's army has been decimated in that battle.Half of Gleason's force stays on that battlefield.
4:15 Terrify places down a command center.Quietly, Terrify adds a base. These are the moves that decide long games.
4:22 Gleason places down a hatchery.More workers, more money: Gleason expands.
5:06 Gleason's zerglings are pushing out!No patience from Gleason: the first units are already marching.
5:24 The two armies clash and a large battle starts to happen!The armies collide — this is the fight both of them wanted.
🎙 Dead even — neither player has found the edge yet.
5:45 Gleason failed to break through Terrify's marine defense line.Terrify holds the early rush without blinking.
6:09 With excellent skills and micro, Terrify managed to fend off Gleason while losing less than half of his army.Gleason keeps most of his army intact through the exchange.
6:24 That attack didn't seem to do much damage, Terrify destroyed only less than half of Gleason's army.Terrify clips Gleason's army — real damage, but Gleason fights on.
6:49 Terrify's army is small compared to Gleason!Terrify is badly outgunned — Gleason's force is a size larger.
7:12 Terrify decides to move out with his armies.No more waiting. Terrify pushes.
7:54 Eager to end the game, Gleason moves out with his armies.Here it comes: Gleason crosses the map with everything.
8:11 As both armies meet, they soon start exchanging fires!The dance is over. They fight.
8:23 Terrify gains early map control with his marines!Gleason wasn't ready. Terrify's early aggression takes the lead.
8:45 With excellent skills and micro, Gleason managed to fend off Terrify while losing less than half of his army.Terrify keeps most of his army intact through the exchange.
🎙 The armies trade evenly; this one is still anyone's game.
9:23 After that battle, Terrify still has most of his army with him.Gleason keeps most of his army intact through the exchange.
9:50 Terrify places down a command center.More workers, more money: Terrify expands.
10:12 Gleason places down a hatchery.Quietly, Gleason adds a base. These are the moves that decide long games.
10:32 Terrify feels confident with his marines and decides to push out.Terrify goes early — pressure before either side is ready.
10:57 Gleason's zerglings are pushing out!Gleason goes early — pressure before either side is ready.
11:19 Both armies meet at the center of the map and start attacking.Contact in the middle of the map. Everything is committed.
11:46 Gleason's zerglings surround Terrify's marines and kills it off!Terrify wasn't ready. Gleason's early aggression takes the lead.
12:08 After that battle, Terrify still has most of his army with him.A cheap fight for Gleason — the losses are light.
12:25 Losing only less than half of his army, Gleason seems to be fine.A cheap fight for Terrify — the losses are light.
🎙 Nothing between them. One engagement could decide it.
— The mid game —
12:59 Gleason is flying his mutalisks towards his opponent.Gleason's mid-game army is assembled — and it's moving.
13:11 As both armies meet, they soon start exchanging fires!Neither side backs off — the battle is joined.
13:37 Terrify seems to have run out of scans! Gleason's lurkers cleans up the remaining army!Terrify's defense bends, then snaps. Gleason takes the middle of the game.
14:07 After that battle, Gleason destroyed about half of Terrify's army.Half of Terrify's force is gone — Gleason took it apart.
14:28 Losing only less than half of his army, Gleason seems to be fine.Terrify keeps most of his army intact through the exchange.
14:51 Terrify's number of expansions are equal to Gleason's.The economies mirror one another. Nothing between Terrify and Gleason yet.
15:14 Terrify places down a command center.Quietly, Terrify adds a base. These are the moves that decide long games.
15:43 Gleason places down a hatchery.More workers, more money: Gleason expands.
15:57 Gleason starts pushing across the map.Gleason has seen enough — the army moves out.
🎙 Even footing again — the tension builds.
16:30 The two armies clash and a large battle starts to happen!Both players push to the middle of the map, and a large fight breaks out.
16:51 Gleason's well-placed lurkers caught Terrify's tanks and medics off-guard! Terrify's army is completely melting!Terrify's defense bends, then snaps. Gleason takes the middle of the game.
17:23 Losing only less than half of his army, Terrify seems to be fine.Gleason keeps most of his army intact through the exchange.
17:43 With excellent skills and micro, Gleason managed to fend off Terrify while losing less than half of his army.A cheap fight for Terrify — the losses are light.
18:08 Terrify tried to sneak a drop but it was discovered by Gleason.The sneak attack is sniffed out — Gleason shuts the door on Terrify.
18:19 Eager to end the game, Gleason moves out with his armies.Here it comes: Gleason crosses the map with everything.
18:56 The two armies clash and a large battle starts to happen!The armies collide — this is the fight both of them wanted.
19:15 Terrify seems to have run out of scans! Gleason's lurkers cleans up the remaining army!Terrify's defense bends, then snaps. Gleason takes the middle of the game.
19:35 Losing only less than half of his army, Terrify seems to be fine.Gleason keeps most of his army intact through the exchange.
🎙 Even footing again — the tension builds.
20:13 With excellent skills and micro, Gleason managed to fend off Terrify while losing less than half of his army.A cheap fight for Terrify — the losses are light.
20:22 Terrify dropped some marines into Gleason's mineral line!The raid lands — Terrify chips away at Gleason's foundation.
21:01 Terrify's number of expansions are equal to Gleason's.Base for base, they're level — Terrify and Gleason match each other.
21:18 Terrify places down a command center.More workers, more money: Terrify expands.
21:41 Gleason places down a hatchery.Gleason plants a new base and dares his opponent to punish it.
22:05 Gleason moves out with his armies.Gleason tightens the formation and starts the long walk.
22:19 The two armies meet and a large battle starts to engage!Both players push to the middle of the map, and a large fight breaks out.
22:44 Gleason was unable to break through Terrify's M&M group.Terrify absorbs the mid-game push — Gleason gained nothing for the cost.
23:24 After that battle, Terrify still has most of his army with him.A cheap fight for Gleason — the losses are light.
🎙 Dead even — neither player has found the edge yet.
23:41 Gleason has lost about half of his army in that battle.Half of Terrify's force stays on that battlefield.
24:09 Terrify's cloaked wraith did not do much to Gleason's economy.Terrify knocks, Gleason answers. No damage done.
24:25 Terrify dropped some marines into Gleason's mineral line!Terrify gets into Gleason's mineral line — workers are dying.
24:50 Gleason starts pushing out with his speedlings and lurkers!Gleason hits the timing — this push arrives exactly when it hurts.
25:25 Both armies meet at the center of the map and start attacking.The dance is over. They fight.
25:43 Gleason seems to control the lurkers very nicely! Even with seemingly equal forces, Terrify is totally losing this battle!The mid-game push crashes through — Gleason breaks Terrify's position.
25:59 With excellent skills and micro, Terrify managed to fend off Gleason while losing less than half of his army.A cheap fight for Gleason — the losses are light.
26:20 Losing only less than half of his army, Gleason seems to be fine.A cheap fight for Terrify — the losses are light.
26:51 Terrify places down a command center.Quietly, Terrify adds a base. These are the moves that decide long games.
🎙 Nothing between them. One engagement could decide it.
27:18 Gleason places down a hatchery.Gleason plants a new base and dares his opponent to punish it.
27:43 Terrify now has enough M&M to take this game! ... Or so he thinks.Terrify hits the timing — this push arrives exactly when it hurts.
28:02 Gleason brings his speedlings and lurkers out of his base!The composition is ready; Gleason starts the push.
28:23 In terms of army size, Terrify and Gleason are around equal.Unit for unit, Terrify and Gleason are level.
28:47 The two armies clash and a large battle starts to happen!The armies collide — this is the fight both of them wanted.
29:17 All of a sudden, Terrify has no armies left while Gleason is continuing to push across the map!A clean, brutal win for Gleason. The push continues.
29:39 Terrify has lost about half of his army in that battle.Gleason pays for that trade with about half his army.
30:03 Terrify destroyed less army than he should, only less than half of Gleason's army has been decimated.Terrify clips Gleason's army — real damage, but Gleason fights on.
30:28 Gleason is flying his mutalisks towards his opponent.Gleason hits the timing — this push arrives exactly when it hurts.
🎙 The armies trade evenly; this one is still anyone's game.
30:57 The two armies meet and a large battle starts to engage!The dance is over. They fight.
31:22 Gleason's well-placed lurkers caught Terrify's tanks and medics off-guard! Terrify's army is completely melting!The mid-game push crashes through — Gleason breaks Terrify's position.
31:29 About half of Terrify's army has been decimated in that battle.Half of Gleason's force stays on that battlefield.
31:55 With excellent skills and micro, Gleason managed to fend off Terrify while losing less than half of his army.Terrify keeps most of his army intact through the exchange.
32:20 Gleason is flying his mutalisks towards his opponent.Gleason hits the timing — this push arrives exactly when it hurts.
32:41 The battle to decide the game begins!The dance is over. They fight.
33:23 All of a sudden, Terrify has no armies left while Gleason is continuing to push across the map!Gleason wins the fight convincingly and keeps rolling forward.
33:39 After that battle, Terrify still has most of his army with him.A cheap fight for Gleason — the losses are light.
33:55 It seems that Terrify only managed to destroy less than half of Gleason's army.Terrify takes a bite out of Gleason's force and backs off.
🎙 Dead even — neither player has found the edge yet.
34:24 Gleason starts pushing out with his speedlings and lurkers!The composition is ready; Gleason starts the push.
34:48 The two armies clash and a large battle starts to happen!Neither side backs off — the battle is joined.
35:19 Gleason seems to control the lurkers very nicely! Even with seemingly equal forces, Terrify is totally losing this battle!Terrify's defense bends, then snaps. Gleason takes the middle of the game.
35:34 After that battle, Terrify still has most of his army with him.Gleason keeps most of his army intact through the exchange.
35:56 That attack didn't seem to do much damage, Terrify destroyed only less than half of Gleason's army.Terrify takes a bite out of Gleason's force and backs off.
36:16 Terrify is in quite a huge army disadvantage, he doesn't have what it takes to win against Gleason's army.Terrify needs production, fast; Gleason's army has outgrown his.
36:52 Terrify moves out with his armies.Here it comes: Terrify crosses the map with everything.
37:17 Unwilling to make the game too long, Gleason starts moving out.No more waiting. Gleason pushes.
37:42 The battle to decide the game begins!The dance is over. They fight.
🎙 Even footing again — the tension builds.
37:58 Gleason kills off Terrify's armies and continues pushing!Gleason wins the fight convincingly and keeps rolling forward.
38:23 That attack didn't seem to do much damage, Gleason destroyed only less than half of Terrify's army.Gleason clips Terrify's army — real damage, but Terrify fights on.
38:57 It seems that Terrify only managed to destroy less than half of Gleason's army.Terrify clips Gleason's army — real damage, but Gleason fights on.
39:17 Terrify starts pushing across the map.No more waiting. Terrify pushes.
39:30 Eager to end the game, Gleason moves out with his armies.Here it comes: Gleason crosses the map with everything.
40:08 The two armies clash and a large battle starts to happen!The armies collide — this is the fight both of them wanted.
— The late game —
40:17 Dark swarm goes down on the ramp and Terrify's marines cannot shoot a thing. The push is over.Terrify throws the endgame army in and Gleason simply refuses to lose.
40:39 Losing only less than half of his army, Gleason seems to be fine.A cheap fight for Terrify — the losses are light.
41:03 About half of Terrify's army has been decimated in that battle.Half of Gleason's force stays on that battlefield.
🎙 Terrify is a step behind and knows it.
41:29 Terrify tried to drop some marines but they were cleared off by Gleason.Terrify knocks, Gleason answers. No damage done.
41:53 Ultralisks in front, cracklings behind, defilers at the back: Gleason commits everything.Everything Gleason has built comes forward at once.
42:26 Currently, neither Terrify nor Gleason appears to be leading in economy.Base for base, they're level — Terrify and Gleason match each other.
42:38 Both armies meet at the center of the map and start attacking.Contact in the middle of the map. Everything is committed.
43:15 Plague, then swarm, then the charge. Terrify's army simply dissolves.There's no rebuilding from that. Gleason's late-game push decides it.
43:30 Terrify has lost about half of his army in that battle.Half of Gleason's force stays on that battlefield.
43:58 Losing only less than half of his army, Gleason seems to be fine.Terrify keeps most of his army intact through the exchange.
44:27 Gleason moves out under dark swarm. The marines can shoot all they like.Max supply, full upgrades: Gleason moves out to end it.
44:52 The two armies clash and a large battle starts to happen!Contact in the middle of the map. Everything is committed.
🎙 Terrify is a step behind and knows it.
45:04 Gleason kills off Terrify's armies and continues pushing!The engagement breaks Terrify's way of life — Gleason marches on.
45:37 After that battle, Gleason destroyed about half of Terrify's army.Gleason cuts Terrify's army in half.
45:57 After that battle, Gleason still has most of his army with him.A cheap fight for Terrify — the losses are light.
46:28 Cloaked wraiths from Terrify are harassing Gleason!Terrify gets into Gleason's mineral line — workers are dying.
46:46 Unwilling to make the game too long, Gleason starts moving out.No more waiting. Gleason pushes.
47:00 It seems like Gleason has more units than Terrify!Count the units: Gleason has the edge over Terrify right now.
47:38 As both armies meet, they soon start exchanging fires!The dance is over. They fight.
47:49 The battle outcome favors Gleason as Terrify's armies melt into Gleason's armies' weapon fire!Gleason wins the fight convincingly and keeps rolling forward.
🎙 The armies are no longer comparable: Gleason is far ahead.
48:32 Terrify lost more than half of his army in that battle.That fight gutted Gleason — more than half the force is gone.
48:56 After that battle, Gleason still has most of his army with him.A cheap fight for Terrify — the losses are light.
49:09 Unwilling to suffer further harassment, Terrify taps out!Terrify GGs. A hard-fought game comes to its end.
GG. Gleason closes it out over Terrify.