← Amateur Division 4
Amateur League · Amateur Division 4 · Season 1 · Round 19 · Bo5
· Tue, Oct 6 2026 · 16:00 server time
Games
4 · · ▶ replay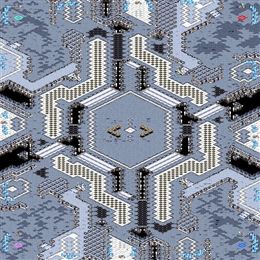
■ Jernau Morat Gurgeh
■ Tinker
army value
■ Jernau Morat Gurgeh
■ Tinker
economy
Play-by-play (55 lines)
0:11 Tinker spawns in Teal at s3 while Jernau Morat Gurgeh spawns in Purple at s1.Tinker takes s3 in Teal; Jernau Morat Gurgeh settles in at s1 in Purple.
0:36 Jernau Morat Gurgeh opens Overpool against Tinker's 12 Hatch.The builds are down: 12 Hatch from Tinker, Overpool from Jernau Morat Gurgeh.
— The early game —
1:21 Tinker places down a hatchery.Tinker takes another base — the economy widens.
1:52 Jernau Morat Gurgeh places down a hatchery.Jernau Morat Gurgeh plants a new base and dares his opponent to punish it.
2:22 Tinker decides to put some pressure on his opponent.Tinker has seen enough — the army moves out.
🎙 Nothing between them. One engagement could decide it.
2:43 Jernau Morat Gurgeh pushes out with his zerglings! It appears that these zerglings have speed upgrade!No patience from Jernau Morat Gurgeh: the first units are already marching.
3:19 The two armies meet and a large battle starts to engage!Neither side backs off — the battle is joined.
3:48 Tinker with the more superior zergling control successfully fends off Jernau Morat Gurgeh's zerglings!Tinker holds the early rush without blinking.
4:15 That attack didn't seem to do much damage, Jernau Morat Gurgeh destroyed only less than half of Tinker's army.Jernau Morat Gurgeh takes a bite out of Tinker's force and backs off.
4:54 Losing only less than half of his army, Jernau Morat Gurgeh seems to be fine.A cheap fight for Tinker — the losses are light.
5:14 Jernau Morat Gurgeh places down a hatchery.More workers, more money: Jernau Morat Gurgeh expands.
5:54 Tinker pushes out with his zerglings! It appears that these zerglings have speed upgrade!No patience from Tinker: the first units are already marching.
6:20 Jernau Morat Gurgeh's speedlings rapidly push out across the map.Jernau Morat Gurgeh tests the door early. Is anyone home?
6:52 Tinker places down a hatchery.Quietly, Tinker adds a base. These are the moves that decide long games.
🎙 The armies trade evenly; this one is still anyone's game.
7:11 Both armies meet at the center of the map and start attacking.Both players push to the middle of the map, and a large fight breaks out.
7:54 Jernau Morat Gurgeh successfully fends off Tinker's attacks.Jernau Morat Gurgeh holds! The push breaks against a perfect defense.
8:14 With excellent skills and micro, Jernau Morat Gurgeh managed to fend off Tinker while losing less than half of his army.Tinker keeps most of his army intact through the exchange.
8:47 Tinker has lost about half of his army in that battle.Jernau Morat Gurgeh pays for that trade with about half his army.
9:23 Tinker's speedlings rapidly push out across the map.Tinker goes early — pressure before either side is ready.
9:48 Jernau Morat Gurgeh pushes out with his zerglings! It appears that these zerglings have speed upgrade!Jernau Morat Gurgeh goes early — pressure before either side is ready.
10:18 The two armies meet and a large battle starts to engage!Contact in the middle of the map. Everything is committed.
11:01 Tinker was out-microed by Jernau Morat Gurgeh and loses all his attacking forces.The attack shatters on Jernau Morat Gurgeh's line. Great positioning.
11:15 After that battle, Jernau Morat Gurgeh still has most of his army with him.Tinker keeps most of his army intact through the exchange.
🎙 Slight advantage Jernau Morat Gurgeh as the game develops.
12:05 Jernau Morat Gurgeh only destroyed about half of Tinker's army.Half of Tinker's force is gone — Jernau Morat Gurgeh took it apart.
12:19 Jernau Morat Gurgeh places down a hatchery.Quietly, Jernau Morat Gurgeh adds a base. These are the moves that decide long games.
12:53 Tinker is bringing his speedlings out for a walk and maybe decide to kill the enemy zerglings on the way.Tinker goes early — pressure before either side is ready.
13:23 Jernau Morat Gurgeh is bringing his speedlings out for a walk and maybe decide to kill the enemy zerglings on the way.No patience from Jernau Morat Gurgeh: the first units are already marching.
13:57 Tinker places down a hatchery.More workers, more money: Tinker expands.
14:35 As both armies meet, they soon start exchanging fires!Both players push to the middle of the map, and a large fight breaks out.
15:05 Jernau Morat Gurgeh with the more superior zergling control successfully fends off Tinker's zerglings!Jernau Morat Gurgeh holds the early rush without blinking.
15:24 With excellent skills and micro, Jernau Morat Gurgeh managed to fend off Tinker while losing less than half of his army.A cheap fight for Tinker — the losses are light.
16:10 Tinker has lost about half of his army in that battle.Half of Jernau Morat Gurgeh's force stays on that battlefield.
🎙 Jernau Morat Gurgeh holds the stronger army for now.
16:34 Attempting to end the game, Jernau Morat Gurgeh moves out with his armies.Jernau Morat Gurgeh has seen enough — the army moves out.
17:00 Both armies meet at the center of the map and start attacking.The armies collide — this is the fight both of them wanted.
— The mid game —
17:28 Jernau Morat Gurgeh with the more superior mutalisk micro wins the mutalisk battle!The mid-game push crashes through — Jernau Morat Gurgeh breaks Tinker's position.
18:09 Tinker has lost about half of his army in that battle.Jernau Morat Gurgeh pays for that trade with about half his army.
— The late game —
18:32 After that battle, Jernau Morat Gurgeh still has most of his army with him.Tinker keeps most of his army intact through the exchange.
19:06 Both Tinker and Jernau Morat Gurgeh appears to have equal expansions now.The economies mirror one another. Nothing between Tinker and Jernau Morat Gurgeh yet.
19:45 Jernau Morat Gurgeh places down a hatchery.More workers, more money: Jernau Morat Gurgeh expands.
19:58 Attempting to end the game, Jernau Morat Gurgeh moves out with his armies.Jernau Morat Gurgeh has seen enough — the army moves out.
20:42 Tinker places down a hatchery.Tinker takes another base — the economy widens.
🎙 Jernau Morat Gurgeh has built a commanding army lead — Tinker needs something special here.
20:57 Both armies meet at the center of the map and start attacking.The dance is over. They fight.
21:48 Jernau Morat Gurgeh made some nice zergling maneuver and won the zergling battle!The mid-game push crashes through — Jernau Morat Gurgeh breaks Tinker's position.
22:01 The attack was a success, Tinker lost more than half of his army in that battle.That fight gutted Jernau Morat Gurgeh — more than half the force is gone.
22:35 That attack didn't seem to do much damage, Tinker destroyed only less than half of Jernau Morat Gurgeh's army.Tinker clips Jernau Morat Gurgeh's army — real damage, but Jernau Morat Gurgeh fights on.
23:00 Unwilling to suffer further harassment, Tinker taps out!Nothing left to defend with — Tinker taps.
Jernau Morat Gurgeh takes it — the mid game decided this one.
■ Thereunto
■ Myles
army value
■ Thereunto
■ Myles
economy
Play-by-play (42 lines)
0:08 The game starts with Orange Thereunto spawning at s1 and Yellow Myles spawning at s2.Thereunto in Orange at s1. Myles in Yellow at s2. The map is set.
0:51 Myles opens One Fact FE against Thereunto's One Fact FE.The builds are down: One Fact FE from Thereunto, One Fact FE from Myles.
— The early game —
1:24 Thereunto places down a command center.Thereunto takes another base — the economy widens.
1:52 Myles places down a command center.Myles plants a new base and dares his opponent to punish it.
2:18 Thereunto figures he has enough vultures to put on early pressure on his opponent so he decides to push out.Thereunto slides the first vultures across the map — early mines, early pressure.
🎙 The armies trade evenly; this one is still anyone's game.
3:01 Myles bravely pushes out with his marines and vultures.Myles slides the first vultures across the map — early mines, early pressure.
3:46 The battle to decide the game begins!Here it comes: two full armies, one engagement.
4:18 Nice marine micro! Myles kills off Thereunto's marines and forces Thereunto to pull some SCVs!Thereunto wasn't ready. Myles's early aggression takes the lead.
4:41 Thereunto has lost about half of his army in that battle.Myles pays for that trade with about half his army.
5:23 Thereunto destroyed less army than he should, only less than half of Myles's army has been decimated.Thereunto takes a bite out of Myles's force and backs off.
6:04 Myles decides to put on early pressure on his opponent by bringing out his marines.Myles slides the first vultures across the map — early mines, early pressure.
6:25 As both armies meet, they soon start exchanging fires!The armies collide — this is the fight both of them wanted.
6:59 With enough marines, Myles kills off Thereunto's defending marines.Thereunto wasn't ready. Myles's early aggression takes the lead.
7:37 Thereunto has lost about half of his army in that battle.Myles pays for that trade with about half his army.
🎙 It's all going Myles's way right now.
8:22 Thereunto destroyed less army than he should, only less than half of Myles's army has been decimated.Thereunto clips Myles's army — real damage, but Myles fights on.
— The mid game —
8:51 Myles bravely pushes out with his marines and vultures.Myles slides the first vultures across the map — early mines, early pressure.
9:16 Thereunto places down a command center.Quietly, Thereunto adds a base. These are the moves that decide long games.
9:50 Myles places down a command center.More workers, more money: Myles expands.
10:34 Both armies meet at the center of the map and start attacking.Here it comes: two full armies, one engagement.
11:02 All of a sudden, Thereunto has no armies left while Myles is continuing to push across the map!A clean, brutal win for Myles. The push continues.
11:46 Thereunto lost about half of his army in that battle.Half of Myles's force stays on that battlefield.
12:16 After that battle, Myles still has most of his army with him.Thereunto keeps most of his army intact through the exchange.
12:42 Myles figures he has enough vultures to put on early pressure on his opponent so he decides to push out.Myles slides the first vultures across the map — early mines, early pressure.
🎙 Myles edges ahead on army strength.
13:30 The two armies clash and a large battle starts to happen!The dance is over. They fight.
13:56 Myles showed some epic marine micro, Thereunto lost all of his fighting marines!Thereunto wasn't ready. Myles's early aggression takes the lead.
— The late game —
14:34 Thereunto lost about half of his army in that battle.Myles pays for that trade with about half his army.
15:18 After that battle, Myles still has most of his army with him.A cheap fight for Thereunto — the losses are light.
15:34 Myles decides to put on early pressure on his opponent by bringing out his marines.Myles slides the first vultures across the map — early mines, early pressure.
16:07 The two armies meet and a large battle starts to engage!Contact in the middle of the map. Everything is committed.
16:44 Myles showed some epic marine micro, Thereunto lost all of his fighting marines!The early pressure works — Myles breaks Thereunto's front door.
🎙 Myles's force dwarfs what Thereunto has left on the field.
17:22 Thereunto lost more than half of his army in that battle.Myles limps away with less than half the army he arrived with.
18:08 With excellent skills and micro, Myles managed to fend off Thereunto while losing less than half of his army.A cheap fight for Thereunto — the losses are light.
18:45 Myles figures he has enough vultures to put on early pressure on his opponent so he decides to push out.Myles slides the first vultures across the map — early mines, early pressure.
19:19 Thereunto having no armies left to defend, has no choice but to tap out.Nothing left to defend with — Thereunto taps.
Myles takes it — the early game decided this one.
■ Ringlet
■ Postulant
army value
■ Ringlet
■ Postulant
economy
Play-by-play (83 lines)
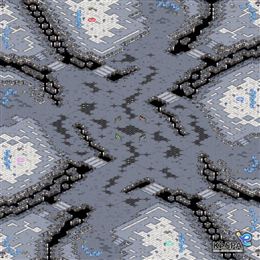
0:14 The game starts with Green Postulant spawning at s1 and Orange Ringlet spawning at s2.Postulant takes s1 in Green; Ringlet settles in at s2 in Orange.
0:32 Postulant gets 2 Fact Vulture against Ringlet's 14 Nexus.Scouting done, plans revealed: Postulant's 2 Fact Vulture against Ringlet's 14 Nexus.
— The early game —
0:59 Postulant places down a command center.Postulant plants a new base and dares his opponent to punish it.
1:29 Ringlet warps in a nexus.Ringlet takes another base — the economy widens.
1:50 Postulant figures he has enough vultures to put on early pressure on his opponent so he decides to push out.Postulant goes early — pressure before either side is ready.
🎙 The armies trade evenly; this one is still anyone's game.
2:30 Ringlet is putting on early pressure with his dragoon.No patience from Ringlet: the first units are already marching.
2:44 As both armies meet, they soon start exchanging fires!Neither side backs off — the battle is joined.
3:12 Postulant lost some of his marines to Ringlet's goons.The early pressure works — Ringlet breaks Postulant's front door.
3:36 About half of Postulant's army has been decimated in that battle.Ringlet pays for that trade with about half his army.
4:16 It seems that Postulant only managed to destroy less than half of Ringlet's army.Postulant clips Ringlet's army — real damage, but Ringlet fights on.
4:40 Ringlet warps in a nexus.Ringlet plants a new base and dares his opponent to punish it.
5:06 Postulant decides to start pushing across the map.Postulant tightens the formation and starts the long walk.
5:32 Ringlet is pushing out with his dragoons.Ringlet tests the door early. Is anyone home?
5:58 Postulant places down a command center.Postulant takes another base — the economy widens.
🎙 The armies trade evenly; this one is still anyone's game.
6:27 Both armies meet at the center of the map and start attacking.Both players push to the middle of the map, and a large fight breaks out.
6:38 The battle outcome favors Ringlet as Postulant's armies melt into Ringlet's armies' weapon fire!The engagement breaks Postulant's way of life — Ringlet marches on.
7:11 Losing only less than half of his army, Postulant seems to be fine.Ringlet keeps most of his army intact through the exchange.
7:31 With excellent skills and micro, Ringlet managed to fend off Postulant while losing less than half of his army.Postulant keeps most of his army intact through the exchange.
8:09 Both Postulant and Ringlet appears to have equal expansions now.Base for base, they're level — Postulant and Ringlet match each other.
8:32 Ringlet decides to push out with his dragoon.No patience from Ringlet: the first units are already marching.
8:55 Ringlet warps in a nexus.More workers, more money: Ringlet expands.
9:21 The two armies meet and a large battle starts to engage!Both players push to the middle of the map, and a large fight breaks out.
9:50 Postulant lost some of his marines to Ringlet's goons.Postulant wasn't ready. Ringlet's early aggression takes the lead.
🎙 The scales tip toward Ringlet — a lead, but not a safe one.
10:19 After that battle, Postulant still has most of his army with him.Ringlet keeps most of his army intact through the exchange.
10:45 Losing only less than half of his army, Ringlet seems to be fine.A cheap fight for Postulant — the losses are light.
11:20 Postulant places down a command center.Postulant plants a new base and dares his opponent to punish it.
11:33 Ringlet decides to push out with his dragoon.Ringlet tests the door early. Is anyone home?
12:11 Ringlet warps in a nexus.Ringlet plants a new base and dares his opponent to punish it.
12:35 The battle to decide the game begins!Contact in the middle of the map. Everything is committed.
12:55 Postulant's defending marines kills Ringlet's early goons.Postulant holds the early rush without blinking.
13:32 Postulant has lost about half of his army in that battle.Ringlet pays for that trade with about half his army.
14:02 It seems that Postulant only managed to destroy less than half of Ringlet's army.Postulant takes a bite out of Ringlet's force and backs off.
🎙 Even footing again — the tension builds.
14:13 Postulant decides to expand.Postulant takes another base — the economy widens.
— The mid game —
14:39 Ringlet now has enough dragoons to take the game! ... Or so he thinks.Ringlet hits the timing — this push arrives exactly when it hurts.
15:08 The two armies clash and a large battle starts to happen!The dance is over. They fight.
15:50 Ringlet's dragoons dealt with Postulant's vultures where zealots dealt with tanks, the outcome seems to favor Ringlet!The mid-game push crashes through — Ringlet breaks Postulant's position.
16:11 Postulant lost about half of his army in that battle.Half of Ringlet's force stays on that battlefield.
16:29 After that battle, Ringlet still has most of his army with him.Postulant keeps most of his army intact through the exchange.
16:59 Reaver! Reaver! Ringlet's reaver is killing off most of Postulant's workers!The raid lands — Ringlet chips away at Postulant's foundation.
17:25 Ringlet's forces appear to be larger compared to Postulant's!Ringlet's army is visibly the bigger one — Postulant should not take this fight.
17:42 Ringlet tried to sneak in a dark templar but it was killed off before it can deal any damage to Postulant's economy.Ringlet knocks, Postulant answers. No damage done.
🎙 Nothing between them. One engagement could decide it.
18:12 Ringlet now has enough dragoons to take the game! ... Or so he thinks.The composition is ready; Ringlet starts the push.
18:51 Ringlet warps in a nexus.Quietly, Ringlet adds a base. These are the moves that decide long games.
19:13 As both armies meet, they soon start exchanging fires!Contact in the middle of the map. Everything is committed.
19:45 Postulant did not have enough tanks to deal with Ringlet! Ringlet sliced through Postulant!Postulant's defense bends, then snaps. Ringlet takes the middle of the game.
19:58 About half of Postulant's army has been decimated in that battle.Ringlet pays for that trade with about half his army.
20:31 With excellent skills and micro, Ringlet managed to fend off Postulant while losing less than half of his army.A cheap fight for Postulant — the losses are light.
21:04 Postulant tried to lift up the command center but he wasn't in time and it was destroyed by Ringlet's armies.Postulant's expansion burns — Ringlet tears it down.
21:35 Aaaaaa, Postulant's mineral line is stormed by Ringlet's high templars!Ringlet gets into Postulant's mineral line — workers are dying.
21:50 Postulant starts expanding.Quietly, Postulant adds a base. These are the moves that decide long games.
🎙 The scales tip toward Ringlet — a lead, but not a safe one.
22:08 Ringlet has a large number of dragoons and is starting to push out!The composition is ready; Ringlet starts the push.
22:35 Postulant places down a command center.Postulant takes another base — the economy widens.
23:21 The two armies meet and a large battle starts to engage!The armies collide — this is the fight both of them wanted.
— The late game —
23:46 Ringlet kills off Postulant's armies and continues pushing!Ringlet wins the fight convincingly and keeps rolling forward.
24:04 After that battle, Ringlet destroyed about half of Postulant's army.Half of Postulant's force is gone — Ringlet took it apart.
24:39 Losing only less than half of his army, Ringlet seems to be fine.Postulant keeps most of his army intact through the exchange.
25:08 Postulant's cloaked wraith did not do much to Ringlet's economy.Postulant knocks, Ringlet answers. No damage done.
25:26 Ringlet now has enough dragoons to take the game! ... Or so he thinks.Ringlet's mid-game army is assembled — and it's moving.
25:43 As both armies meet, they soon start exchanging fires!Neither side backs off — the battle is joined.
🎙 Postulant is a step behind and knows it.
26:12 Postulant did not have enough tanks to deal with Ringlet! Ringlet sliced through Postulant!Postulant's defense bends, then snaps. Ringlet takes the middle of the game.
26:51 Postulant lost about half of his army in that battle.Half of Ringlet's force stays on that battlefield.
27:12 After that battle, Ringlet still has most of his army with him.Postulant keeps most of his army intact through the exchange.
27:42 Postulant dropped some marines into Ringlet's mineral line!Postulant gets into Ringlet's mineral line — workers are dying.
27:55 Ringlet has a large number of dragoons and is starting to push out!Ringlet's mid-game army is assembled — and it's moving.
28:34 At the moment, Ringlet seems to have more units than Postulant.Ringlet's army is visibly the bigger one — Postulant should not take this fight.
28:52 Both armies meet at the center of the map and start attacking.The armies collide — this is the fight both of them wanted.
29:30 Ringlet micros his zealots nicely to swiftly pass through vultures and hit the tanks! Postulant seems to lose a lot in this battle!Postulant's defense bends, then snaps. Ringlet takes the middle of the game.
🎙 Ringlet's force dwarfs what Postulant has left on the field.
29:43 Postulant lost more than half of his army in that battle.Ringlet limps away with less than half the army he arrived with.
30:07 After that battle, Ringlet still has most of his army with him.Postulant keeps most of his army intact through the exchange.
30:49 Ringlet brings his speedlots and dragoons to pressure his opponent.The composition is ready; Ringlet starts the push.
31:16 Looking at the opponent's overwhelming forces, Postulant GGs!Postulant GGs. A hard-fought game comes to its end.
Postulant taps out. Ringlet's mid game was simply better.
■ Mucosity
■ Mimosa
army value
■ Mucosity
■ Mimosa
economy
Play-by-play (46 lines)
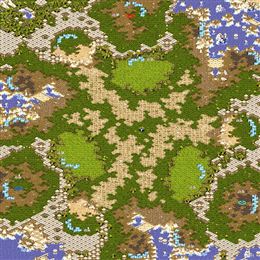
0:07 The game starts with Teal Mucosity spawning at s2 and Red Mimosa spawning at s1.Mucosity in Teal at s2. Mimosa in Red at s1. The map is set.
0:43 Mimosa opens 1 Gate Cybernetics against Mucosity's Siege Expand.Scouting done, plans revealed: Mucosity's Siege Expand against Mimosa's 1 Gate Cybernetics.
— The early game —
1:20 Mucosity starts expanding.Mucosity plants a new base and dares his opponent to punish it.
1:51 Mimosa warps in a nexus.Mimosa takes another base — the economy widens.
2:13 Mucosity moves out with his armies.Mucosity tightens the formation and starts the long walk.
🎙 Nothing between them. One engagement could decide it.
2:58 Mimosa decides to push out with his dragoon.Mimosa goes early — pressure before either side is ready.
3:24 The two armies meet and a large battle starts to engage!Neither side backs off — the battle is joined.
3:56 Mimosa failed to kill off Mucosity's defending marines.Mucosity holds the early rush without blinking.
4:37 After that battle, Mucosity still has most of his army with him.A cheap fight for Mimosa — the losses are light.
5:06 With excellent skills and micro, Mimosa managed to fend off Mucosity while losing less than half of his army.A cheap fight for Mucosity — the losses are light.
5:31 Mimosa warps in a nexus.More workers, more money: Mimosa expands.
6:13 Mucosity figures he has enough vultures to put on early pressure on his opponent so he decides to push out.No patience from Mucosity: the first units are already marching.
6:42 Mimosa is putting on early pressure with his dragoon.Mimosa tests the door early. Is anyone home?
7:27 Mimosa's army is small compared to Mucosity!Mimosa needs production, fast; Mucosity's army has outgrown his.
🎙 The scales tip toward Mucosity — a lead, but not a safe one.
7:50 Mucosity places down a command center.Mucosity takes another base — the economy widens.
8:35 The two armies clash and a large battle starts to happen!Both players push to the middle of the map, and a large fight breaks out.
9:07 Mimosa was out-microed by Mucosity and loses all his attacking forces.Mucosity holds! The push breaks against a perfect defense.
9:29 After that battle, Mucosity still has most of his army with him.Mimosa keeps most of his army intact through the exchange.
10:07 Mimosa has lost about half of his army in that battle.Half of Mucosity's force stays on that battlefield.
10:48 Mucosity decides to put some pressure on his opponent.Mucosity tightens the formation and starts the long walk.
11:16 Mimosa decides to push out with his dragoon.Mimosa tests the door early. Is anyone home?
11:53 Mimosa warps in a nexus.Mimosa takes another base — the economy widens.
12:16 The battle to decide the game begins!Contact in the middle of the map. Everything is committed.
🎙 The scales tip toward Mucosity — a lead, but not a safe one.
12:48 Mucosity's defending marines kills Mimosa's early goons.Mucosity holds the early rush without blinking.
13:25 After that battle, Mucosity still has most of his army with him.A cheap fight for Mimosa — the losses are light.
13:53 Mimosa lost about half of his army in that battle.Half of Mucosity's force stays on that battlefield.
14:26 Mucosity decides to put on early pressure on his opponent by bringing out his marines.Mucosity tests the door early. Is anyone home?
15:03 Mucosity desperate in getting his economy pumped up, expands to another location.More workers, more money: Mucosity expands.
15:45 As both armies meet, they soon start exchanging fires!The dance is over. They fight.
16:16 With really nice micro, Mucosity kills off Mimosa's dragoons.The early pressure works — Mucosity breaks Mimosa's front door.
16:47 About half of Mimosa's army has been decimated in that battle.Half of Mucosity's force stays on that battlefield.
17:19 Mimosa destroyed less army than he should, only less than half of Mucosity's army has been decimated.Mimosa clips Mucosity's army — real damage, but Mucosity fights on.
🎙 Mucosity's force dwarfs what Mimosa has left on the field.
18:00 Mucosity figures he has enough vultures to put on early pressure on his opponent so he decides to push out.Mucosity goes early — pressure before either side is ready.
18:16 The battle to decide the game begins!Neither side backs off — the battle is joined.
18:47 The battle outcome favors Mucosity as Mimosa's armies melt into Mucosity's armies' weapon fire!Mucosity wins the fight convincingly and keeps rolling forward.
19:34 Mimosa has lost about half of his army in that battle.Mucosity pays for that trade with about half his army.
20:12 After that battle, Mucosity still has most of his army with him.Mimosa keeps most of his army intact through the exchange.
— The mid game —
20:36 Mucosity is planting mines with his vultures and... Oh! He's bringing his tank out as well! Looks like this is an attack!Mucosity's mid-game army is assembled — and it's moving.
21:07 After suffering a devastating loss in the battle, Mimosa GGs!Mimosa GGs. A hard-fought game comes to its end.
That's the game: Mucosity defeats Mimosa, settled in the early game.